This site uses affiliate links, meaning that if you make a purchase through our links, we may earn an affiliate commission.
Embarking on the breathtaking Angel’s Landing hike in Zion National Park is an adventure that promises stunning vistas, thrilling heights, and an unforgettable experience.
To ensure you make the most of this iconic trek, we have compiled 6 expert tips for Angel’s Landing hike that will help you navigate the challenging terrain, stay safe, and fully immerse yourself in the beauty of this awe-inspiring trail. From preparation and trail etiquette to overcoming obstacles and capturing the perfect photo, these tips will be your guide to a successful and memorable Angel’s Landing expedition.
So, lace up your boots, pack your enthusiasm, and get ready to embark on this exhilarating journey with our invaluable tips for Angel’s Landing hike.
GOOD TO KNOW: Zion National Park can easily be combined with a visit to Bryce Canyon National Park: Zion to Bryce Canyon in 3 Days – Perfect Rod Trip Itinerary.
Looking for a longer road trip? How about this Epic 7-Day Road Trip Through Utah National Parks?
Zion National Park At-A-Glance
Before diving in, here are a few Zion National Park highlights to help you plan your trip:
- Best Time to Visit Zion National Park
April and May and then September and October, are my favorite months to visit Zion National Park. The temperatures are mild with daytime temps in the 60s and 70s F. You will see fewer crowds as well and have some serene experiences on trails and at viewpoints.
Summer is the high season. Expect a lot of companionship on the trails and everywhere throughout the park. The temperatures skyrocket as well ranging from the high 80s to 100s F.
Winter is a good time to visit Zion National Park. Above all, you will be able to find some solitude. Snow seldom reaches the canyon floor and that being the case, the scenic drive and some hiking can be enjoyed during that time.
- Where to Stay When Visiting Zion National Park
Springdale, UT is conveniently right at the entrance to Zion and it is the perfect getaway to Zion National Park. I stayed in Springdale several times and my two top choices are Hampton Inn & Suites Springdale/Zion National Park, and SpringHill Suites by Marriott Springdale Zion National Park. Both places are clean and comfortable, and the location is perfect.
- How to Get to Zion National Park
The closest International Airports to Zion National Park that you can fly into are located in Las Vegas (LAS), Nevada, and Salt Lake City (SLC), Utah. There are smaller Regional Airports in St. George (SGU), Utah, and Cedar City (CDC), Utah. I use Skyscanner to browse flights and find the best price.
- How to Get Around in Zion National Park
If you are visiting Zion National Park between the months of March through November, then you will have to use the shuttle. No private vehicles are allowed inside the park. The cost of the shuttle is included in your recreational use pass. You can hop on and hop off at any of the shuttle stops.
- How Much Does It Cost to Vist Zion National Park
In order to visit Zion National Park, you need to purchase a recreational day-use pass, which costs $35 per vehicle and is good for 7 consecutive days. You can purchase the pass right at the entrance to the park. If you are visiting several national parks then make sure to get America the Beautiful National Park Pass. This $80 pass is valid for 12 months and gets you into all 400+ national park sites!
6 Expert Tips for Angel's Landing Hike: Maximize Your Adventure
Secure Your Permit for Angel's Landing Hike in Advance
Embarking on the awe-inspiring Angel’s Landing hike requires obtaining a permit in advance. Due to the increasing popularity of the trail, the National Park Service has implemented a permit lottery system to manage the limited capacity and ensure a sustainable hiking experience.
GOOD TO KNOW: You do not need a permit to hike the West Rim Trail from the trailhead at the Grotto to Scout Lookout. However, a permit is required from Scouts Lookout to Angels Landing.
Here’s how you can navigate the process:
- Visit Recreation.gov. to access the permit lottery system. The lottery opens on a specific date, usually several months in advance of the hiking season.
- Permits to hike are issued by lottery in two-time frames: seasonally (1-3 months prior) and day before (1 day prior).
- Permits are issued for three different time slots each day. Each time slot represents a time range during which a hike should begin from the Grotto in Zion Canyon (for example, someone with a ‘Before 9 AM’ permit may begin their hike any time prior to 9 AM at the Grotto).
- For both seasonal and day-before lotteries, applicants may enter each lottery once and apply for a permit for up to six people (including the applicant). When applying, up to seven dates or date ranges along with preferred start times may be selected in preference order.
- There is a $6 non-refundable application fee. Applicants who are issued permits will be charged a $3 per-person fee.
- After the lottery period closes, the park will randomly select and notify the winners via email. If you are selected, you will have a specific timeframe to confirm and pay for your permit. The confirmation email will need to be shown (printed or downloaded) to park staff on the day of your hike.
It is important to note that winning the lottery does not guarantee your desired date, as the availability of permits is limited. Therefore, it is advisable to have alternative dates in mind when applying.
Remember to plan well in advance, remain flexible with your dates, and be prepared to adjust your itinerary accordingly. This process ensures a fair distribution of permits and helps preserve the natural beauty of Angel’s Landing for future hikers.
PRO TIP: Permits are issued for three different time slots each day – Before 9 am, between 9 am and 12 pm, and after 12 pm. My recommendation is to apply for a permit with a time slot scheduled for ‘before 9 am’. On the day of your hike, get on the first shuttle at 6 am. Then, be the first in line at the Grotto Trailhead (Zion Shuttle Stop #6) after the shuttle drops you off. This is the best time to hike Angels Landing via Scouts Lookout. You will have the entire place pretty much to yourself.
Plan Your Hike for the Right Time of Year
Choosing the right time of year for your Angel’s Landing hike is crucial for a successful and enjoyable experience. Consider the following factors when planning your adventure:
- Weather Conditions: The weather in Zion National Park can vary significantly throughout the year. Summers can be scorching, with temperatures often exceeding 100°F (38°C). On the other hand, winters can bring cold temperatures, and the trail may even be icy or closed due to snow. Spring and fall tend to offer more moderate temperatures, making them popular seasons for hiking. Research the weather patterns during your desired time frame to ensure you are prepared with appropriate clothing and gear.
- Crowds: Angel’s Landing is renowned for its stunning views and challenging trail, attracting numerous visitors. To avoid overcrowding and enjoy a more serene experience, consider visiting during weekdays or during the shoulder seasons of spring and fall. These periods typically have fewer visitors, allowing you to immerse yourself in the natural beauty of the hike and have a more peaceful journey.
- Sunrise or Sunset: Witnessing the sunrise or sunset from Angel’s Landing is a truly magical experience. The soft lighting and breathtaking colors painting the landscape will reward you with unforgettable moments.
- Seasonal Closures and Alerts: Before setting out on your Angel’s Landing hike, check for any seasonal closures, trail maintenance, or alerts on the official park website. These updates will ensure that you are aware of any restrictions or changes that might affect your hike. Stay informed and plan accordingly to avoid any unexpected surprises.
Start Early to Beat the Crowds and Heat
When tackling the Angel’s Landing hike, an early start is key to avoiding both the crowds and the intense midday heat.
Here is why starting early is advantageous:
- Beat the Crowds: Angel’s Landing is a popular trail, and it can get crowded, especially during peak seasons, even though it is monitored by the lottery system.
By hitting the trail early in the morning, you will have a better chance of enjoying the hike with fewer people around. This allows for a more peaceful experience, easier navigation on narrow sections of the trail, and ample time to soak in the stunning views without feeling rushed.
- Avoid the Heat: The scorching sun can make the hike challenging, particularly during the summer months.
Starting early not only allows you to take advantage of cooler morning temperatures but also helps minimize your exposure to the intense midday sun.
This is especially important as some parts of the trail offer little shade. By starting early, you can complete a significant portion of the hike before the heat becomes too uncomfortable, ensuring a more pleasant and safer experience overall.
- Capture Unforgettable Moments: Another advantage of an early start is the opportunity to witness the soft morning light illuminating the landscape and casting a magical glow on the surrounding cliffs.
The tranquil ambiance and golden hues provide a perfect backdrop for capturing stunning photos and creating lasting memories.
PRO TIP: To make the most of your Angel’s Landing hike, set your alarm clock and aim to hit the trail shortly after sunrise. This will give you ample time to enjoy the hike, beat the crowds, and stay comfortable during your ascent.
Wear Appropriate Hiking Gear and Footwear
When conquering the challenging terrain of Angel’s Landing, having the right gear and footwear is essential for your comfort and safety.
Here are some recommendations to consider:
- Hiking Shoes: Opt for sturdy and comfortable hiking shoes that provide excellent traction and ankle support. The trail can be steep, rocky, and uneven, so proper footwear will help you navigate with confidence and reduce the risk of slipping or twisting an ankle.
PRO TIP: Break in your shoes before the hike to ensure they are comfortable and won’t cause blisters.
- Moisture-Wicking Clothing: Choose lightweight and breathable clothing made of moisture-wicking materials. These fabrics will help keep you cool and dry by wicking away sweat from your body.
Dress in layers, as the temperature can change throughout the hike, and be prepared for varying weather conditions.
- Sun Protection: Protect yourself from the sun’s harmful rays by wearing a wide-brimmed hat, and sunglasses, and applying sunscreen to exposed skin.
The sun can be intense, especially during the summer months, so take precautions to prevent sunburn and heat-related issues.
- Backpack and Essentials: Carry a comfortable backpack to hold your essentials.
PRO TIP: It is always a good idea to have a trail map, a compass or GPS device, a first aid kit, and a whistle for emergencies.
- Trekking Poles (Optional): Consider using trekking poles to provide extra stability and reduce strain on your knees and legs, particularly during steep ascents and descents. Trekking poles can be beneficial in maintaining balance and relieving some of the stress on your joints.
Stay Hydrated and Fuel Your Body
Proper hydration and fueling are essential for maintaining energy and stamina during your Angel’s Landing hike. Follow these guidelines to stay hydrated and nourished throughout the trail:
- Drink Ample Water: Hydration is crucial, especially during strenuous hikes. Carry an adequate supply of water, considering the duration of your hike and the weather conditions. It’s recommended to drink at least 1 liter of water per 2-3 hours of hiking. Take regular sips to stay hydrated and prevent dehydration.
GOOD TO KNOW: Remember, there are no water sources along the trail, so come prepared.
- Pack Nutritious Snacks: Fuel your body with nutrient-dense snacks to sustain your energy levels. Choose lightweight, high-energy foods such as trail mix, energy bars, nuts, and dried fruits. These snacks provide a mix of carbohydrates, protein, and healthy fats to keep you fueled throughout the hike.
- Plan for a Packed Lunch: If you’re embarking on a full-day hike, consider packing a nutritious lunch to enjoy along the way. Opt for items like sandwiches, wraps, or pre-cooked meals that are easy to carry and provide a balance of carbohydrates, protein, and vegetables.
- Electrolyte Replacement: During longer hikes or on particularly hot days, electrolyte replacement is important to replenish the salts and minerals lost through sweating. Consider bringing electrolyte tablets or sports drinks to maintain a healthy balance.
- Listen to Your Body: Pay attention to your body’s signals and take breaks as needed. Rest in shaded areas to cool down and recover. Use your snack breaks as an opportunity to refuel, hydrate, and recharge your energy levels.
Manage Angel's Landing Hike in Sections
To tackle the Angel’s Landing hike more efficiently, it can be helpful to break it down into distinct sections.
GOOD TO KNOW:
- Roundtrip Distance: 5 miles
- Trail Location: The Grotto (Zion Shuttle Stop #6)
- Time: 4-6 hours
- Elevation Gain: 1,500 feet
- Difficulty: Strenuous
Here’s a suggested way to manage the hike:
- Grotto Trailhead is located at an elevation of 4,300 ft. From Grotto trailhead to Refrigerator Canyon, it is a 600 ft ascent.
- Refrigerator Canyon is located at an elevation of 4,900 ft. From Refrigerator Canyon to Scouts Lookout, is a 450 ft ascent.
- Scouts Lookout is located at an elevation of 5,350 ft. From Scouts Lookout to Angels Landing, it is a 440 ft ascent.
- Angels Landing is located at an elevation of 5,790 ft.
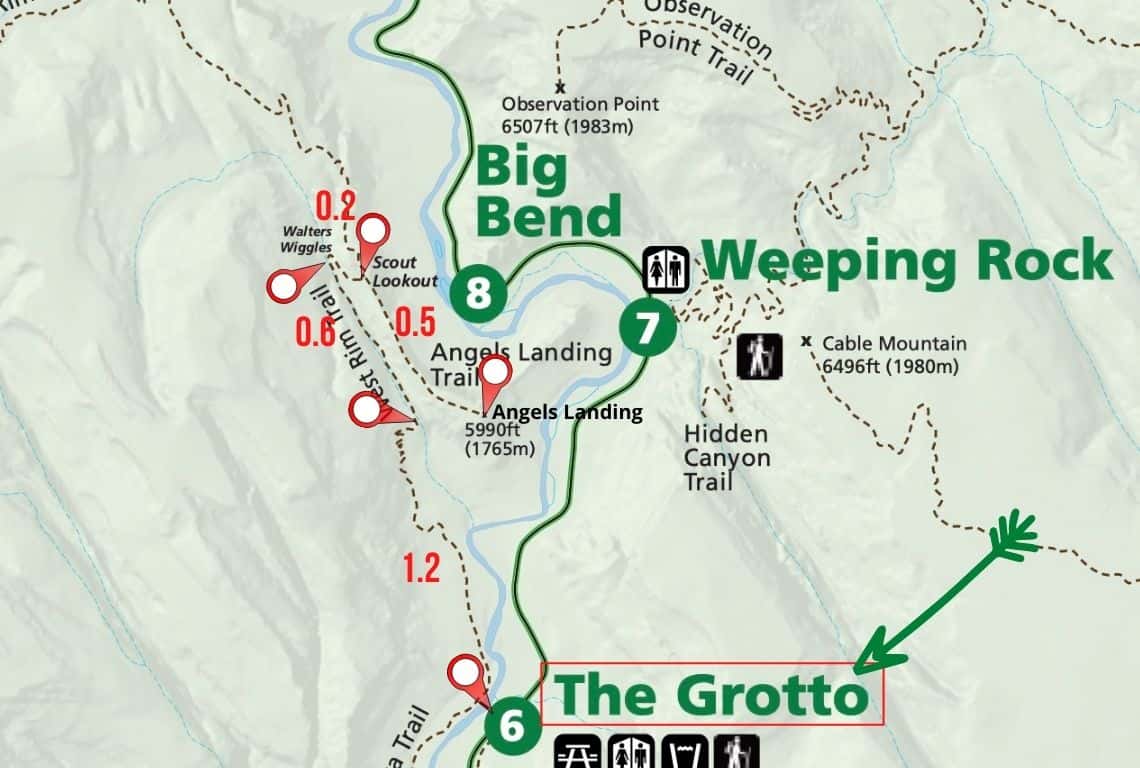
Map of Angels Landing Trail in Zion National Park. Image Credit: NPS
The Grotto Trailhead
Angels Landing Trail starts at the Grotto Trailhead (Zion Shuttle Stop #6). To begin with, cross the hiker’s bridge over the Virgin River and follow the trail as it gradually ascends, and enjoy the serene beauty of the surrounding scenery.
The West Rim Trail
After a short distance from the Grotto Trailhead, you will join the West Rim Trail. This section offers a moderate ascent through a picturesque landscape, with occasional glimpses of the canyon and the Virgin River below.
Pace yourself and appreciate the gradual elevation gain.
Refrigerator Canyon
At 1.2 miles from the trailhead along the West Rim Trail, you will enter Refrigerator Canyon. This shaded section provides a cool respite from the sun and offers a refreshing break.
Take a moment to soak in the tranquil atmosphere, and give your heart, lungs, and legs a break before proceeding.
Next, as you get closer to the lower cliffs the trail begins a series of switchbacks. Although the switchbacks are wiggly, these are not the famous Walter’s Wiggles yet. You will reach them later on.
The first series of switchbacks will take you to the top of the ridge above Refrigerator Canyon.
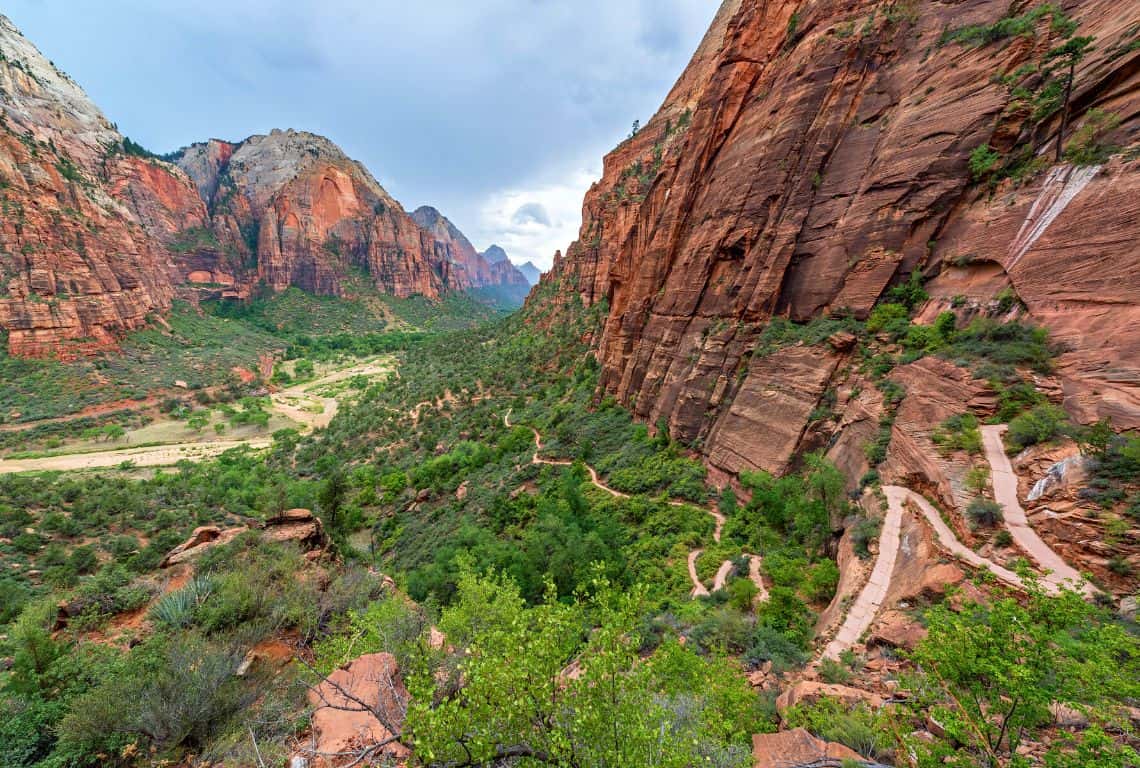
The West Rim Trail / Tips for Angel’s Landing Hike
Walter's Wiggles
When you exit Refrigerator Canyon, you will encounter Walter’s Wiggles, a series of 21 steep switchbacks. This challenging section requires some extra effort, but the reward is worth it.
Take your time, catch your breath, and marvel at the stunning views that start to unfold.
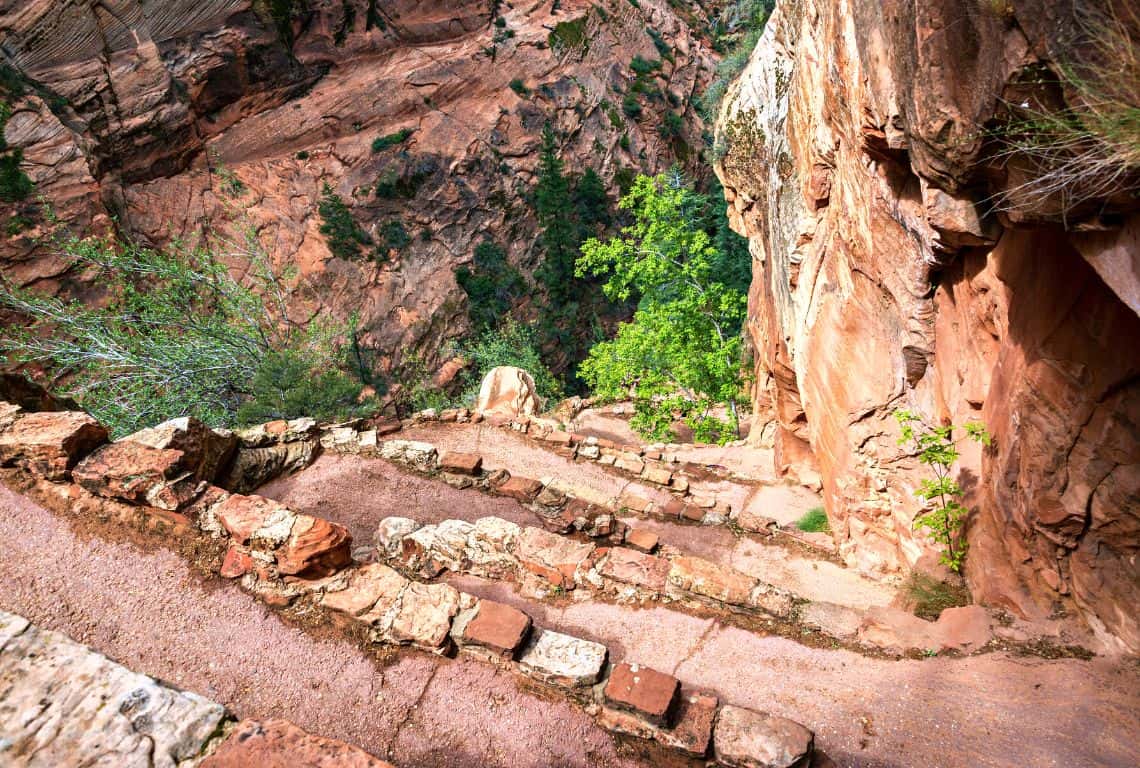
Walter’s Wiggles / Tips for Angel’s Landing Hike
Scout Lookout
After conquering Walter’s Wiggles, you will reach Scout Lookout.
This is a popular resting point and turnaround spot for those who prefer not to continue to the final, more exposed section.
From Scout Lookout, you can still enjoy breathtaking vistas of the surrounding landscape and appreciate the accomplishment of reaching this point.
GOOD TO KNOW: If you look down, you will be able to see the canyon below and the Organ. The Organ is a 400-foot high rib that juts out to the east of Angels Landing above the Virgin River. It derives its name from its many tall crack systems resembling organ pipes.
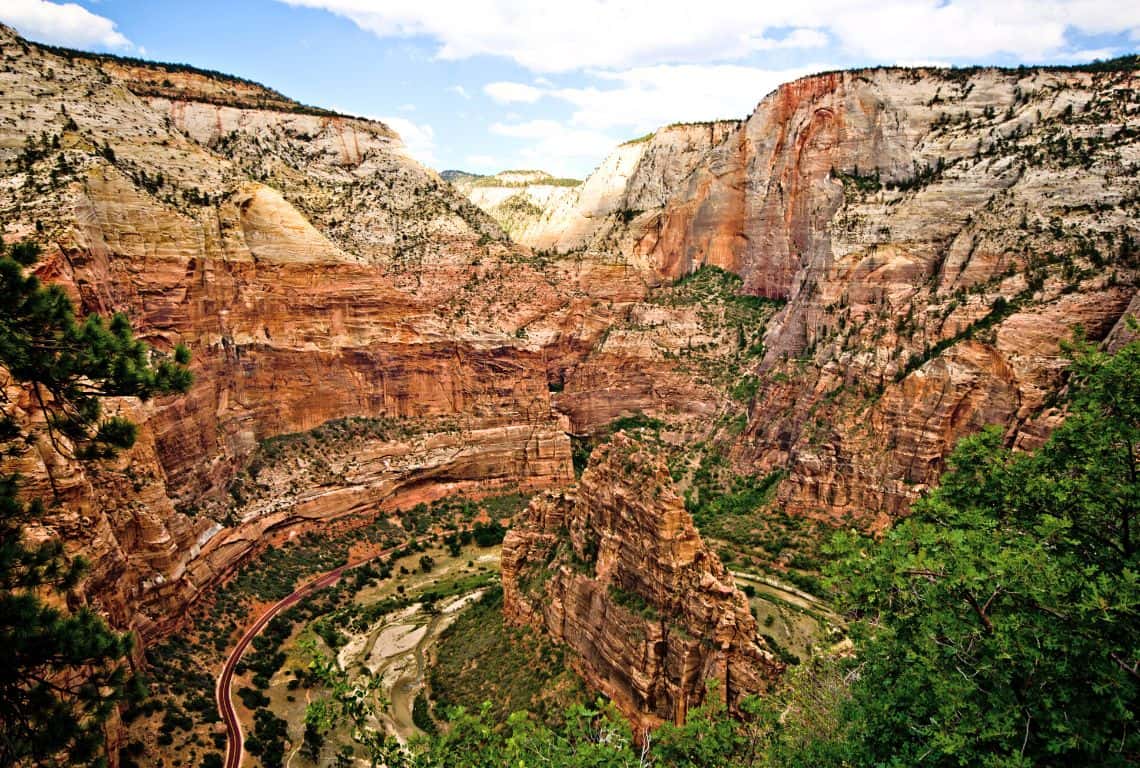
The Organ / Tips for Angel’s Landing Hike
Final Stretch - Angel's Landing
If you choose to press on, the last section of the hike involves a thrilling and exposed ridge with chains for support.
PRO TIP: Proceed with caution, grip the chains firmly, and gradually pull yourself up. Get a good foothold. Once you get the rhythm going, you will be gaining height. Take your time to enjoy the incredible panoramic views and bask in the sense of achievement.
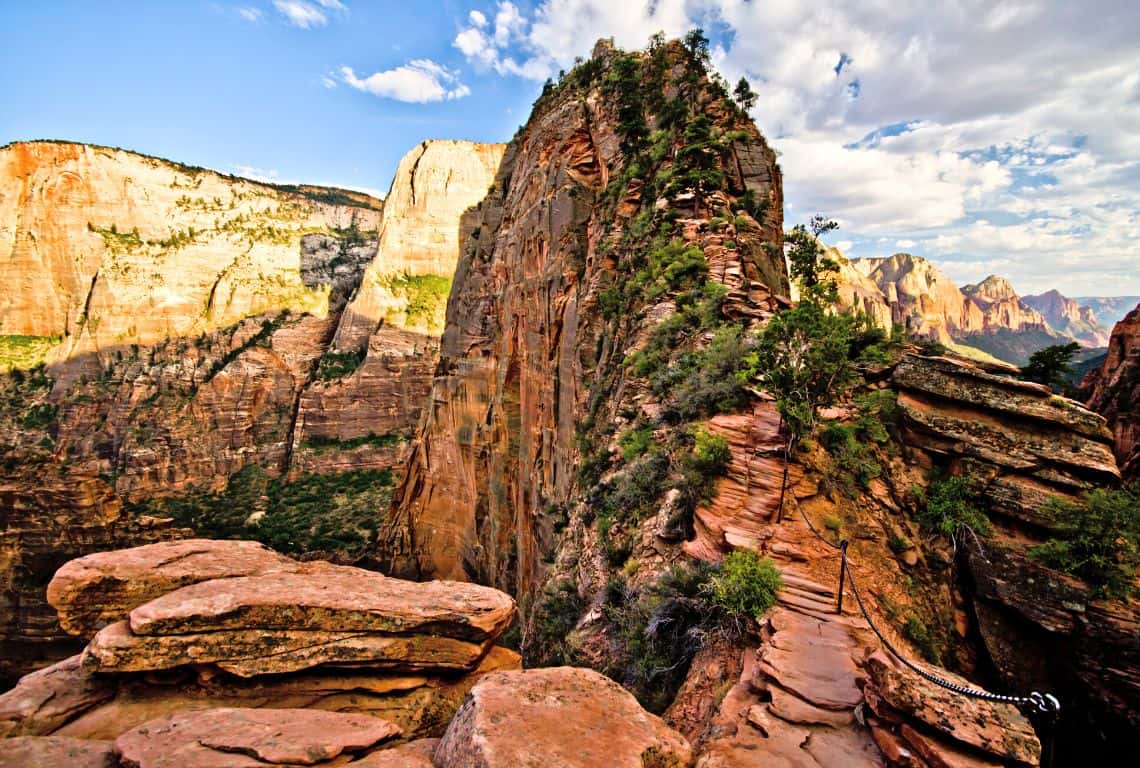
Final Stretch – Angel’s Landing / Tips for Angel’s Landing Hike
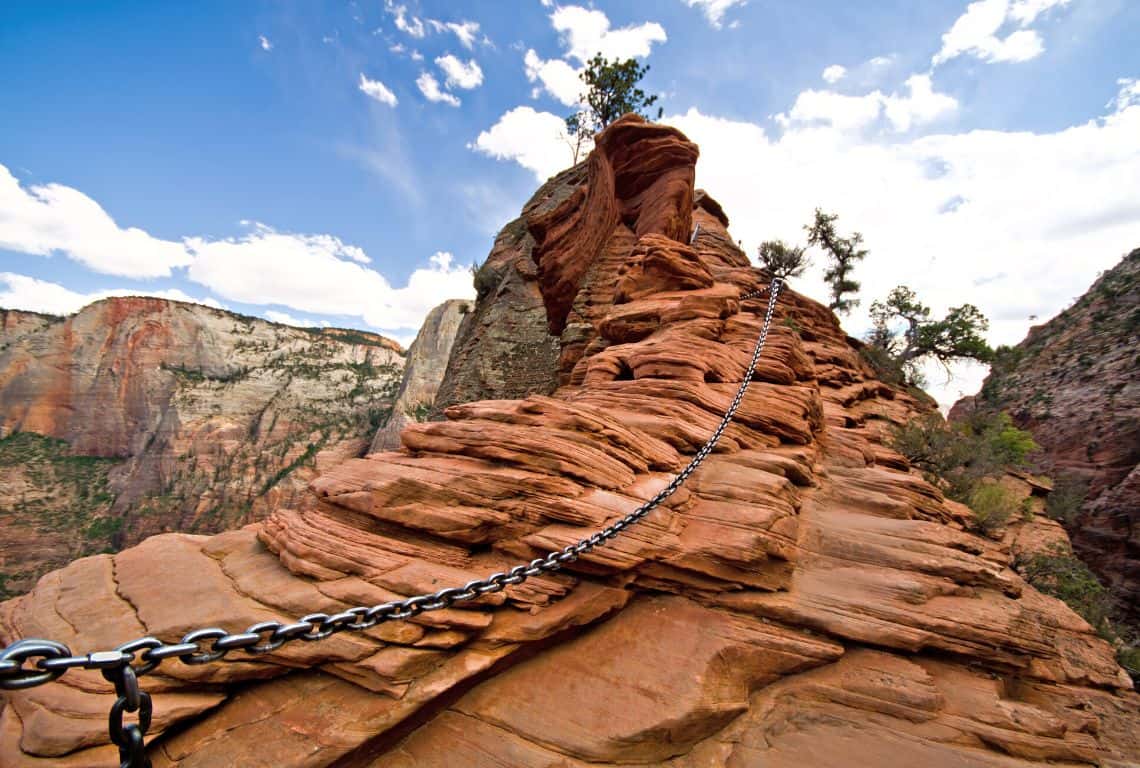
You will be using chains anchored to the cliff walls to help you get higher up. There are guard rails as well as some steep carved steps to steady your climb / How to Hike Angels Landing via Scouts Lookout
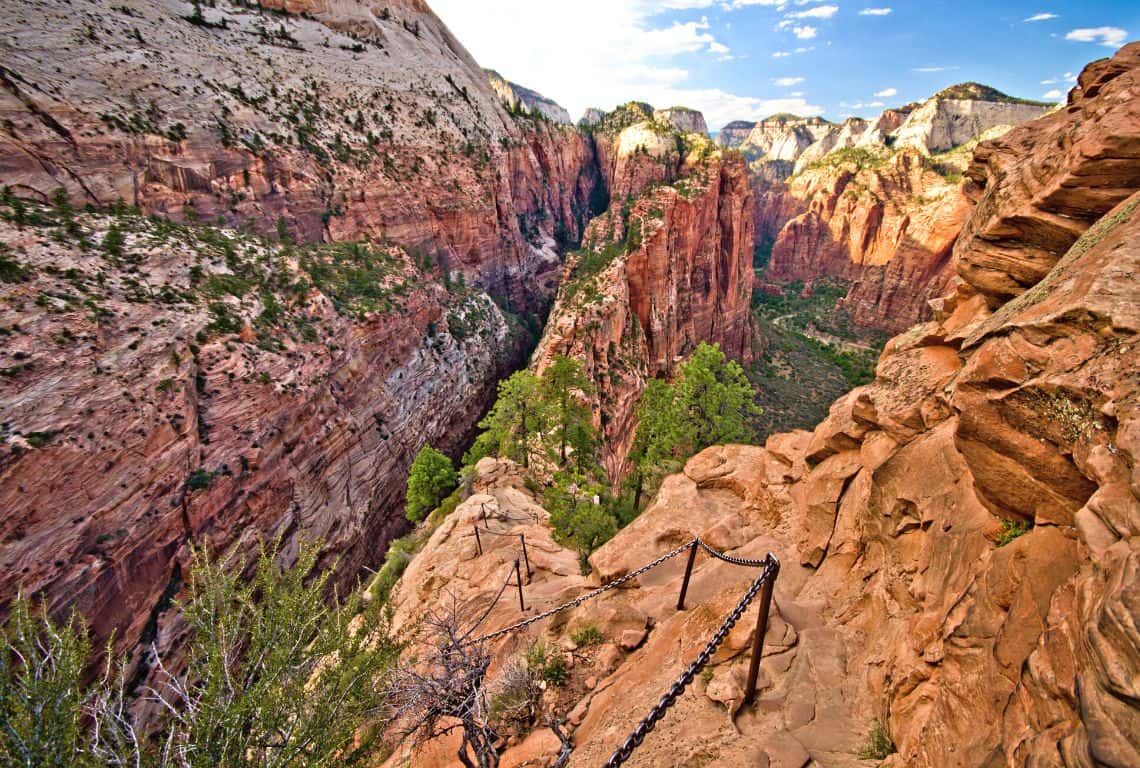
Make sure to grasp the chain with all your strength and gradually pull yourself up. Get a good foothold / How to Hike Angels Landing via Scouts Lookout
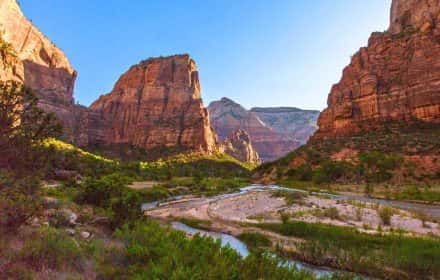
GOOD TO KNOW: The views from Angel’s Landing are off the charts! To the north, you can see Zion Canyon all the way up to the Temple of Sinawava.
To the south, you can see the Great White Throne, and directly east you can make out the trail to Echo Canyon/Observation Point as it climbs out of the canyon.
Now, when you are ready to get back, retrace your steps. Ahead of you is a long descent back to where you started. Take your time and enjoy the views along the way!
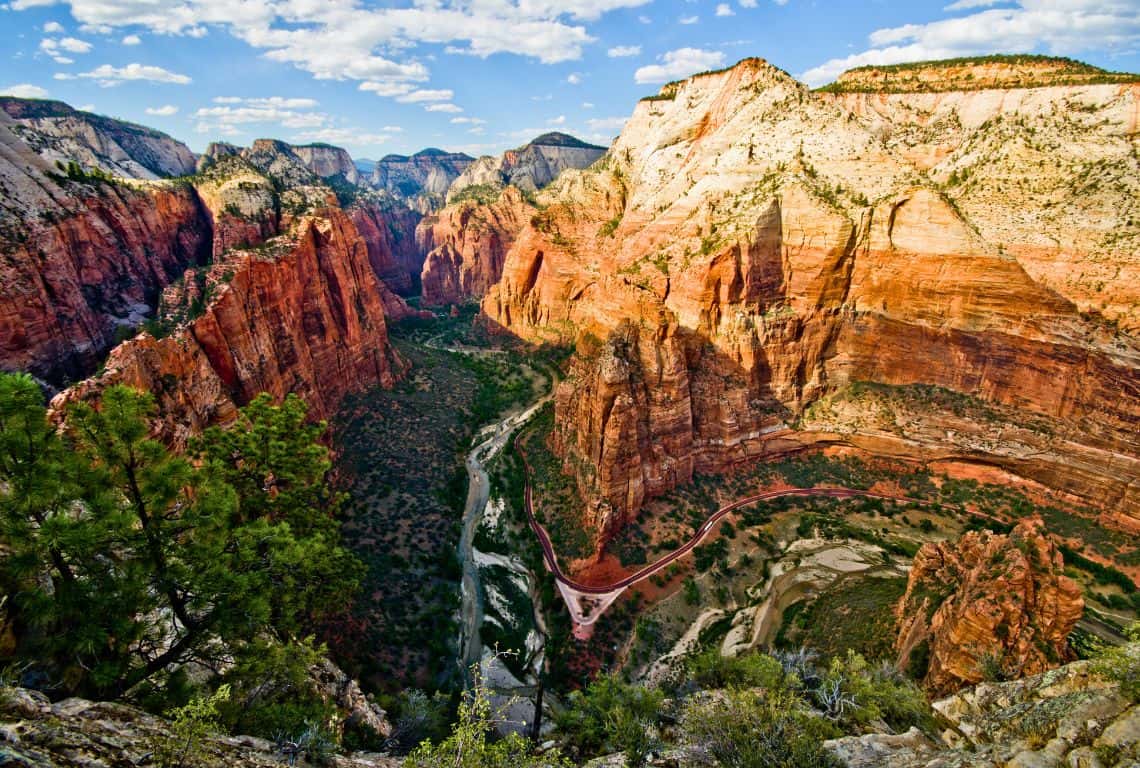
View from Angel’s Landing / Tips for Angel’s Landing Hike
Final Intrepid Scout's Tips for Angel's Landing Hike
When hiking Angel’s Landing, it’s important to pace yourself and listen to your body.
- Take Breaks: The hike to Angel’s Landing can be physically demanding, especially during the steep sections and exposed areas. Take regular breaks to rest, catch your breath, and admire the stunning scenery. Use these breaks as an opportunity to hydrate and refuel your body.
- Know Your Limits: Be aware of your physical fitness level and hiking experience. If you’re a beginner or not accustomed to strenuous hikes, it is important to acknowledge your limitations. Consider hiking with a partner or in a group, as they can provide support and assistance if needed.
- Monitor the Weather: Keep an eye on the weather forecast before and during your hike. If unfavorable weather conditions, such as thunderstorms or high winds, are expected, it is crucial to prioritize your safety and consider postponing the hike to a more suitable time.
- Stay Hydrated and Fuelled: Proper hydration and nutrition are essential for maintaining your energy levels and preventing fatigue. Drink water regularly and consume snacks or meals that provide sustained energy, such as complex carbohydrates and protein.
GOOD TO KNOW: A trip to Zion is perfect when paired with a side trip to Bryce Canyon National Park. Check out my post: Zion to Bryce Canyon: 3-Day Adventure (with Maps and Photos)
Get inspired with this Epic 7-Day Road Trip Through Utah National Parks.
More Information About Zion National Park
Learn More About Zion National Park:
Complete Guide to Zion National Park – 13 Tips for First Visit
13 Best Stops on Scenic Drive in Zion National Park (Maps+Tips)
One Day in Zion National Park (Itinerary+Maps+Tips)
7 Easy Hikes in Zion National Park with Stunning Views (Perfect for Beginners)
6 Enchanting Towns And Cities Near Zion National Park (with Best Places to Stay and Eat)
Travel Planning and Road Trip Ideas:
Zion to Bryce Canyon in 3 Days (Itinerary Ideas+Useful Tips)
Epic 7-Day Road Trip Through Utah National Parks
Did You Find This Useful?
Why Not Save Tips for Angel's Landing Hike to Your Pinterest Board!
Now, It Is Your Turn, I Would Like to Hear Back from You!
Are you planning a trip to Zion National Park?
Please let me know! Drop me a quick comment right below!
Click on any of the images below to get inspired and to help you with the planning process for your trip to Zion!
