This site uses affiliate links, meaning that if you make a purchase through our links, we may earn an affiliate commission.
Discover the top spots for stunning shots in Zion National Park – a haven for photography enthusiasts. This guide outlines the best photography locations in Zion National Park to capture the park’s natural beauty.
And that’s not all – mastering photography in Zion can be tricky, so I’ve included practical techniques to ensure your photos truly reflect the awe-inspiring surroundings.
- 1. Zion National Park At-A-Glance
- 2. 8 Best Photography Locations in Zion National Park
-
- 2.1. Canyon Junction Bridge - Best Location in Zion to Photograph the Watchman (Most Iconic View of Zion)
- 2.2. Canyon Overlook - Best Location to Photograph Zion Canyon
- 2.3. Behind Zion Human History Museum - Best Place to Photograph Towers of the Virgin
- 2.4. Court of the Patriarchs - Zion's Most Inspiring Landmark to Photograph
- 2.5. Angels Landing - Most Popular Photography Location in Zion National Park
- 2.6. Observation Point - Zion Canyon Top Photography Location
- 2.7. Zion Narrows - Zion's Most Famous Photo Location
- 2.8. Emerald Pools - Most Scenic Place to Photograph in Zion
- 3. Zion National Park Photography Guide
- 4. Intrepid Scout's Tips for Best Photography Locations in Zion National Park
Zion National Park At-A-Glance
Before diving into the best photography locations in Zion, here are a few highlights to help you plan your trip to Zion National Park:
- Best Time to Visit Zion National Park to Avoid the Crowds
Zion National Park is a great destination to visit at any time of the year. And, it is open 24 hours a day, every day of the year. However, some facilities reduce the opening hours during winter. I have visited Zion so many times at different times of the year and I have to honestly say that it is an awesome place to see no matter what month you visit!
- Where to Stay in or near Zion National Park
Hands down, nothing beats staying inside the park! However, accommodations are very limited and you will need to make reservations at least a year in advance. Zion Lodge is the only hotel inside the park.
I have stayed in Springdale, UT many times. It is conveniently right at the entrance to Zion and it is the perfect getaway to Zion National Park.
My two top choices are Hampton Inn & Suites Springdale/Zion National Park, and SpringHill Suites by Marriott Springdale Zion National Park. Both places are clean and comfortable, and the location is perfect.
- How to Get to Zion National Park
The closest International Airports to Zion National Park that you can fly into are located in Las Vegas (LAS), Nevada, and Salt Lake City (SLC), Utah.
There are smaller Regional Airports in St. George (SGU), Utah, and Cedar City (CDC), Utah.
- How to Get Around in Zion National Park
If you are visiting Zion National Park between March and November, then you will have to use the shuttle. No private vehicles are allowed inside the park.
The cost of the shuttle is included in your recreational use pass. You can hop on and hop off at any of the shuttle stops.
- Intrepid Scout’s Tip:
It costs $35 to enter the park. The entrance pass is good for 7 consecutive days. If you are visiting several national parks then make sure to get America the Beautiful National Park Pass. This $80 pass is valid for 12 months and gets you into all 400+ national park sites!
- IMPORTANT:
Always check Zion National Park’s Website for the most recent updates on trail and road closures and changes to shuttle operating hours before planning your visit.
In response to concerns about crowding and congestion on the trail, on and after April 1, 2022, everyone who hikes Angels Landing needs to have a permit. Find out how to get the permit HERE.
8 Best Photography Locations in Zion National Park
Canyon Junction Bridge - Best Location in Zion to Photograph the Watchman (Most Iconic View of Zion)
The spot right at Canyon Junction Bridge is the one of best photography locations in Zion National Park to capture Watchman Mountain with the Virgin River flowing below.
Hands down, it is the most iconic view of Zion National Park.
GOOD TO KNOW: Canyon Junction Bridge is located near the intersection of Zion-Mount Carmel Highway (Hwy 9) and Valley Road. There is a parking area, however, parking is very limited.
What I like to do is take the shuttle and get off at the Visitor’s Center and then take Pa’rus Trail to Canyon Junction Bridge. It is an easy trail with little elevation change. Specifically, it is 1.7 miles one way with awesome views along the way!
If the shuttle is fully operational, then take the shuttle and get off Canyon Junction – shuttle stop # 3.
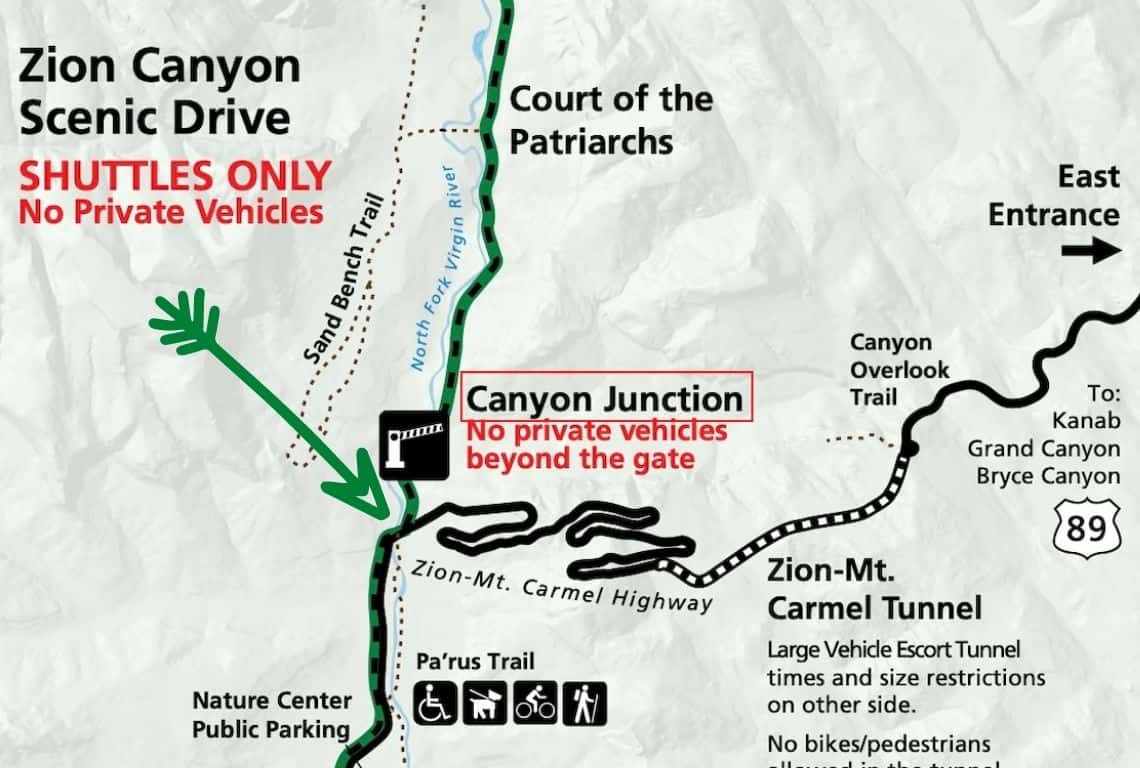
Map of Canyon Junction in Zion National Park. Image Credit: NPS
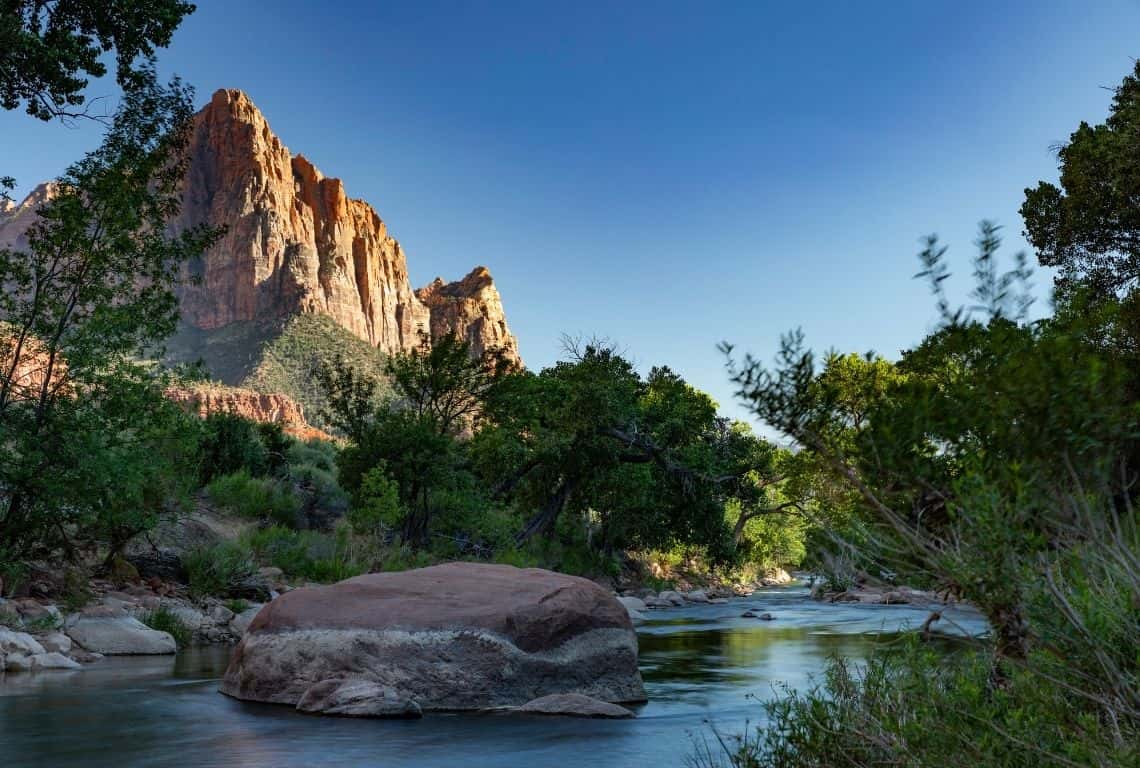
The Watchman Mountain with the Virgin River / Best Photography Locations in Zion
Canyon Junction Bridge is a hotspot for catching the Watchman during sunset, and it gets pretty crowded. Expect a bunch of photographers aiming for that perfect shot of the striking red-rock mountain.
So, plan to get there well before sunset to snag your spot!
The best lighting comes right after sunset during the Golden Hour when the colors are warmer and softer.
Don’t rush off too soon – stick around for the Blue Hour, that twilight period when the Sun is well below the horizon. The remaining sunlight gives off a mostly blue hue during this time.
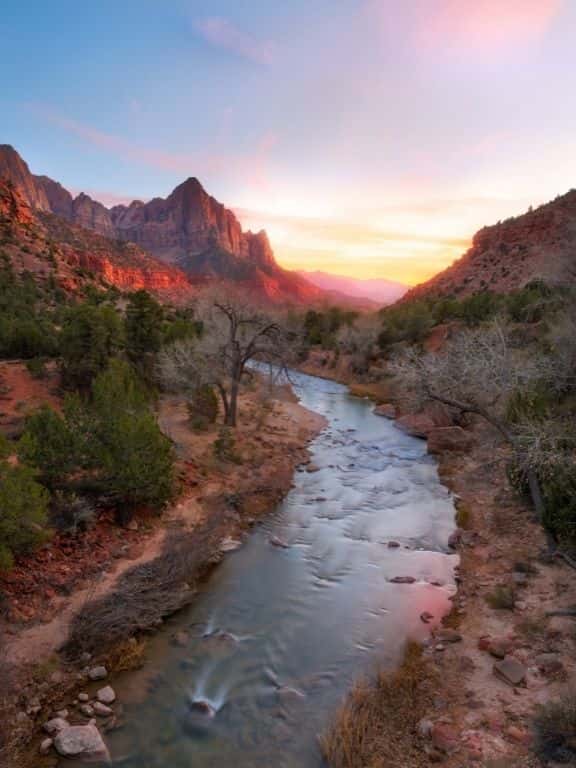
The Watchman at Sunset in Zion National Park
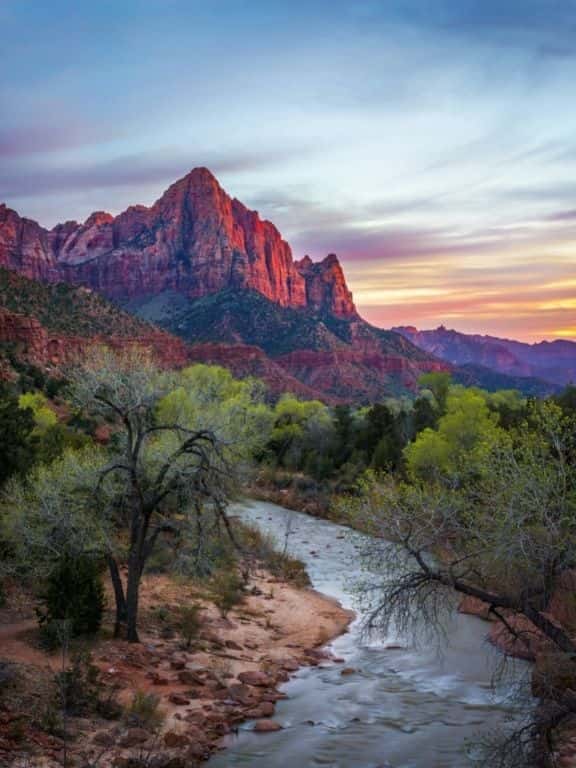
The Watchman at Sunset in Zion National Park
INTREPID’S PRO TIP: I suggest bypassing the crowded sunset scene at Canyon Junction Bridge. Opt for capturing the Watchman at sunrise instead! This way, you’ll have more space to set up your gear and, with any luck, enjoy a bit of solitude in the process.
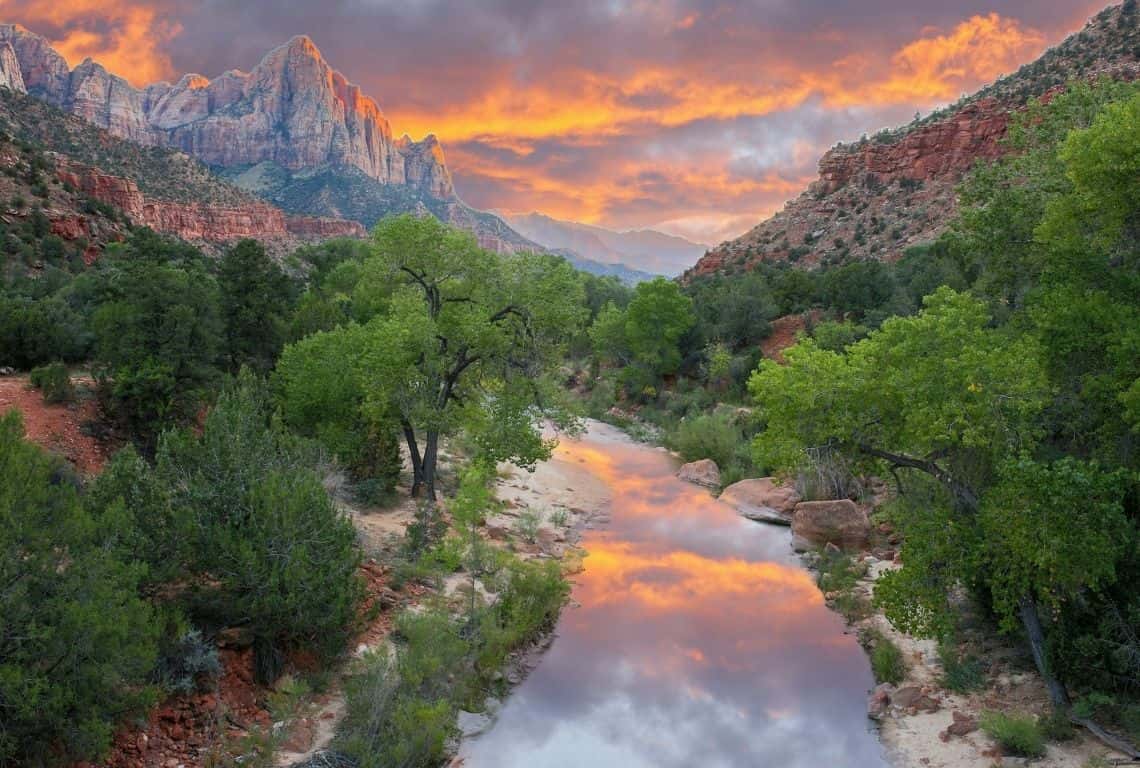
The Watchman at Sunrise with the Virgin River
GOOD TO KNOW: Canyon Junction Bridge isn’t a bad option for snapping shots of the Milky Way alongside the Watchman and the Virgin River. It’s not the most ideal spot due to the light coming from Springdale, but it can still get the job done.
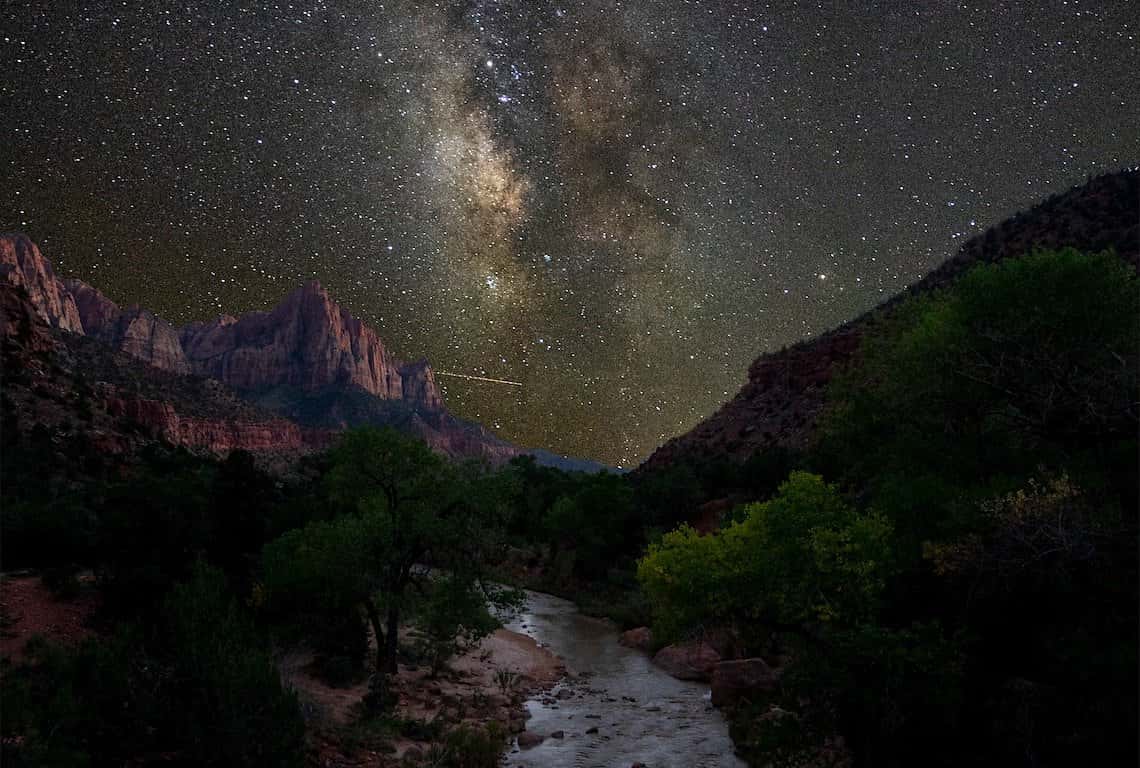
The Watchman at Night in Zion National Park
Canyon Overlook - Best Location to Photograph Zion Canyon
Canyon Overlook is the best viewpoint in Zion National Park to photograph the Zion Canyon with the switchbacks below the west end of the Mount Carmel Tunnel, West Temple, the Towers of the Virgins, the Streaked Wall, and the Beehives.
East Temple rises directly above the Overlook, towering more than 2,200 feet above the canyon floor.
The view is simply off the charts!
GOOD TO KNOW: The Canyon Overlook Trailhead is located on Highway 9, right by the east entrance to the Mount Carmel Tunnel. There is no shuttle service available in this area, so you will need to use your vehicle.
The parking area is located on the south side of the road, and the trailhead is across the street, on the north side of the road.
The hike from the trailhead to the Canyon Overlook is about 1 mile one-way. It is a moderate hike with some sharp however short inclines.
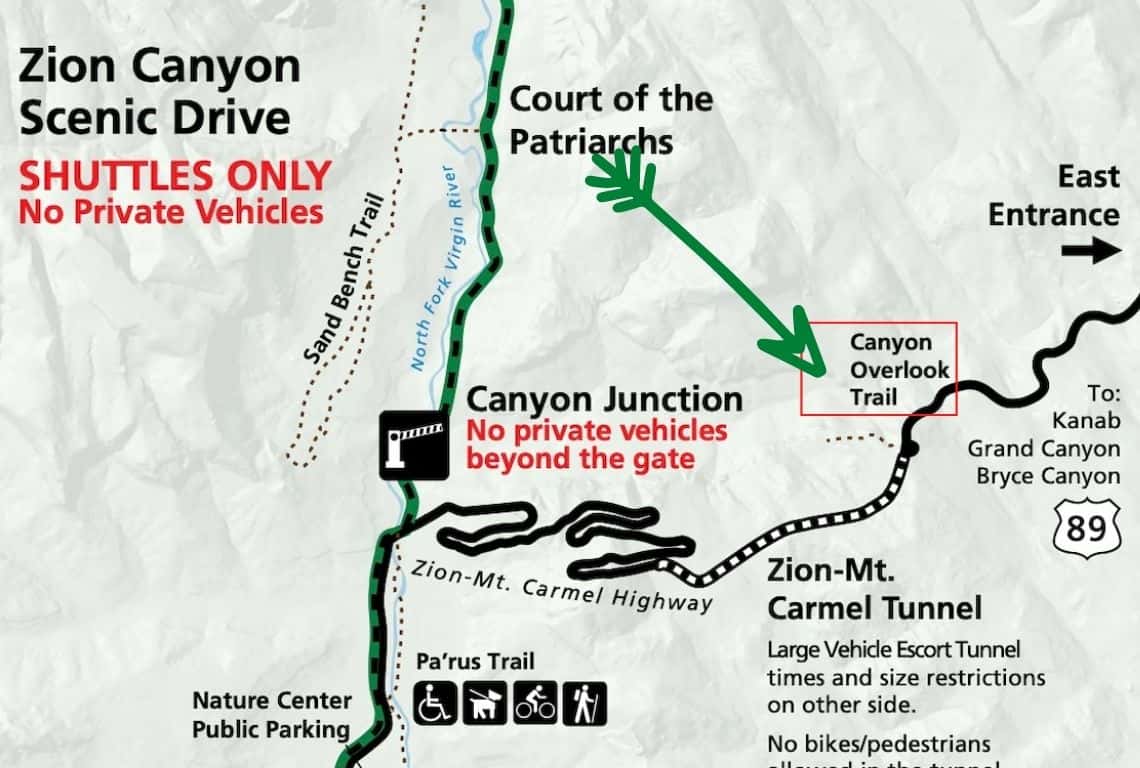
Map of Canyon Overlook Trail in Zion National Park. Image Credit: NPS
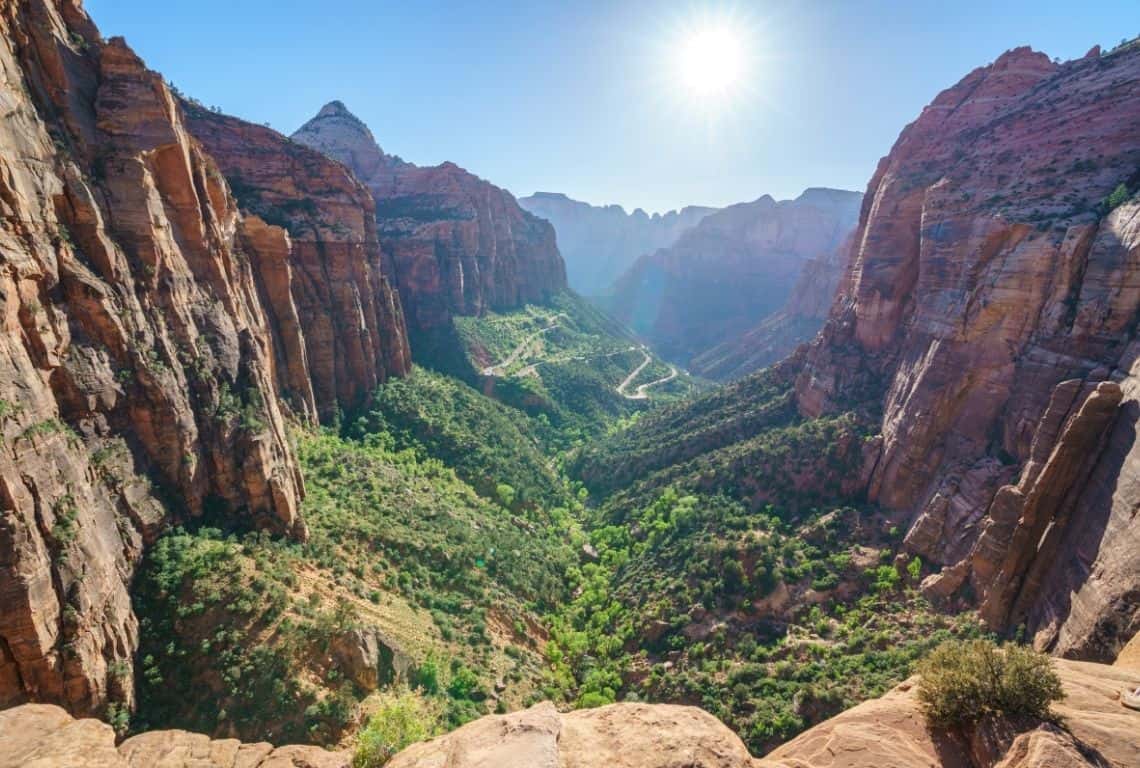
Canyon Overlook in Zion National Park
Capturing Canyon Overlook during the day can be challenging, especially on bright, sunny days when the sun is directly in front of you. Check out the photo above for a glimpse.
For a better experience, opt for sunrise or sunset to truly appreciate the beauty of the canyon.
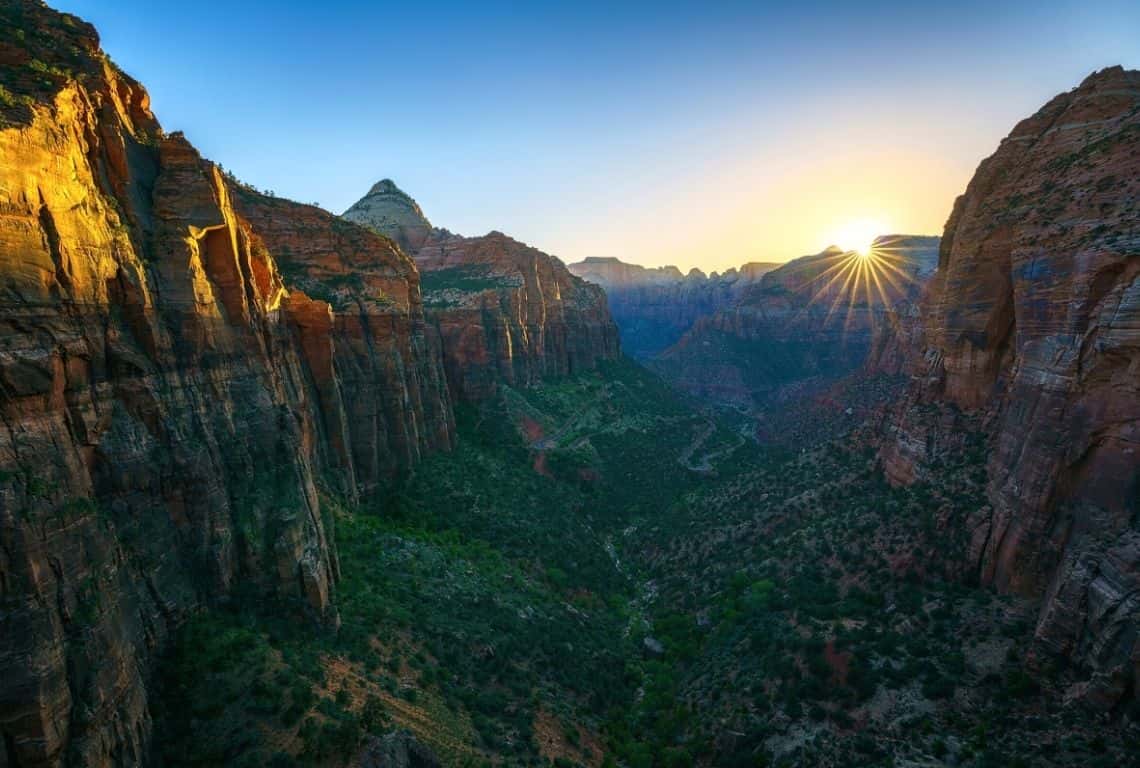
Canyon Overlook n Zion National Park
Now, make sure to stay a bit after the sunset and try to get some pictures of Canyon Overlook during the Blue Hour.
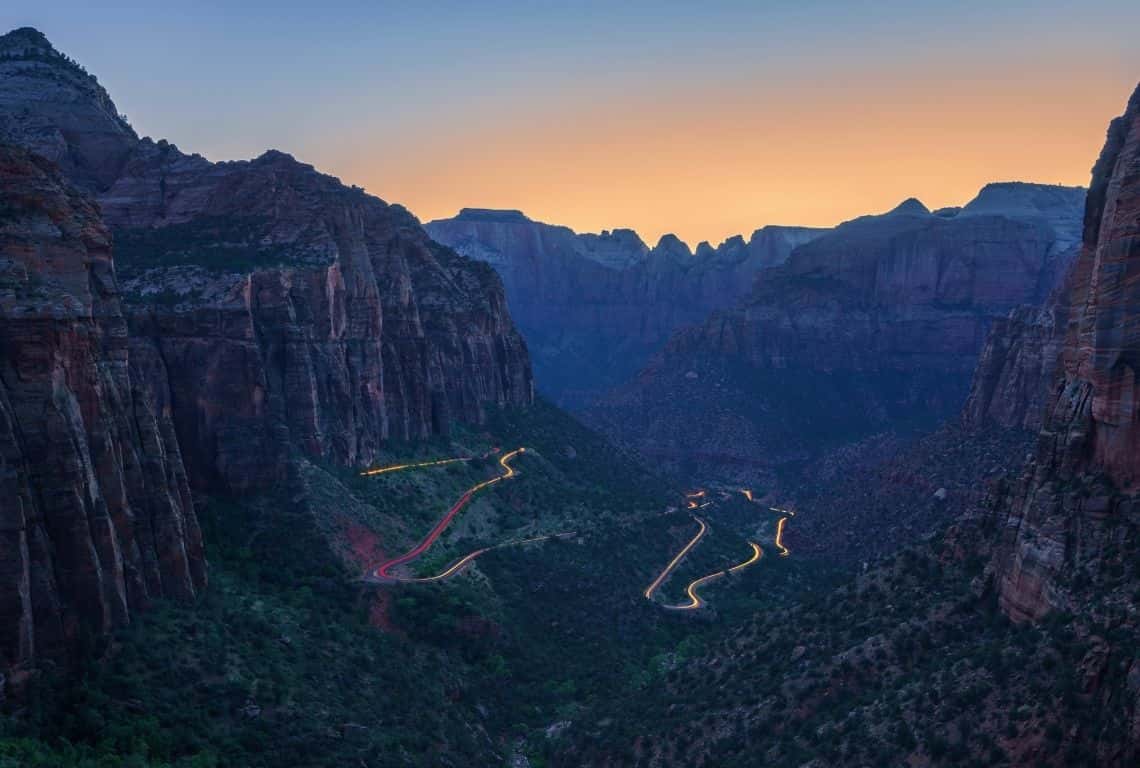
Canyon Overlook n Zion National Park / Best Photography Locations in Zion
If there is any cloud coverage predicted for the day, then I would definitely head to Canyon Overlook on that day.
Also, the clouds will make the sunset more dramatic and you might be rewarded with some incredible sky colors.
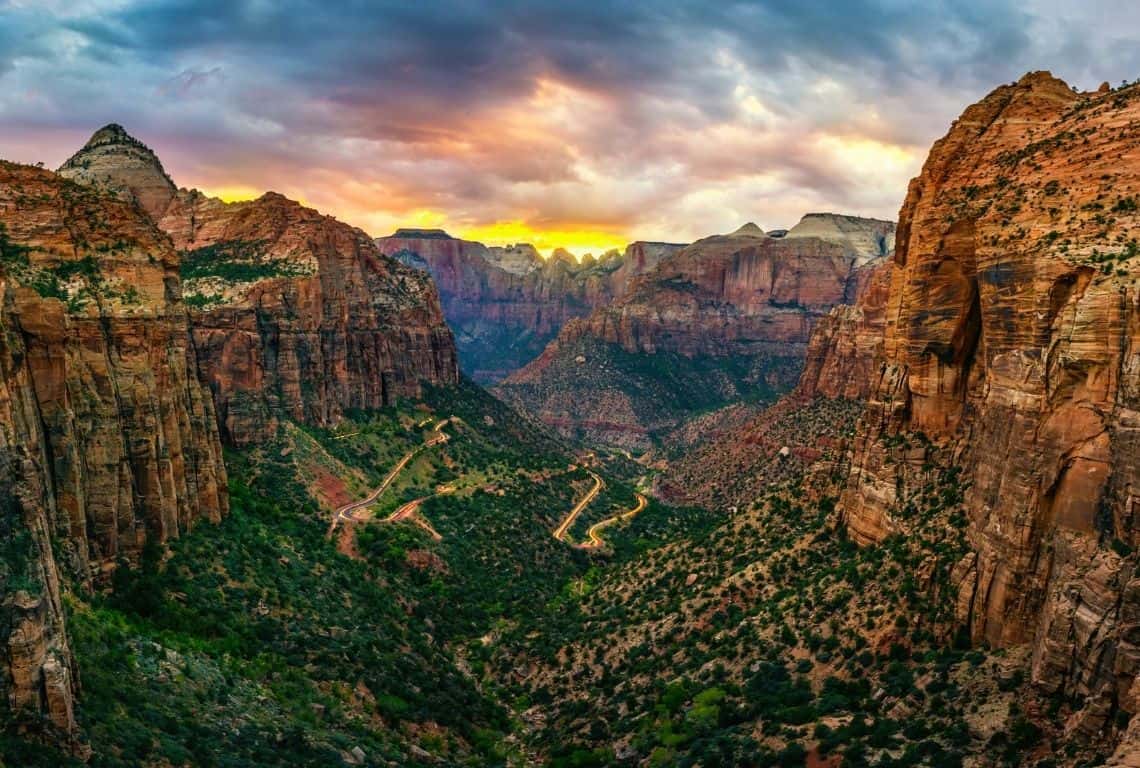
Canyon Overlook in Zion National Park
Behind Zion Human History Museum - Best Place to Photograph Towers of the Virgin
The Towers of the Virgin, the large collection of peaks, are best photographed from anywhere behind the Zion Human History Museum.
GOOD TO KNOW: The Zion Human History Museum is located inside the park, 1.5 miles north of the park’s South Entrance on the main park road, or 11 miles west of the park’s East Entrance.
If the shuttle is fully operational, you can take the shuttle and get off at the Museum – Shuttle stop # 2.
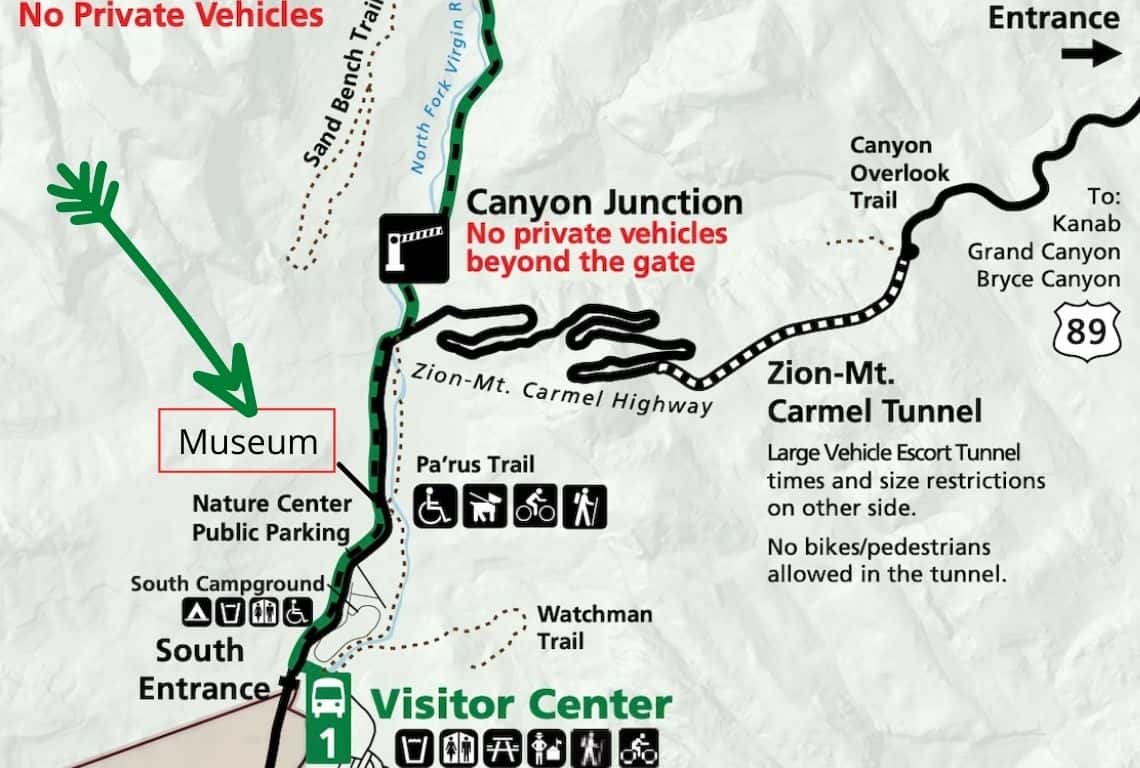
Map of Human History Museum in Zion National Park. Image Credit: NPS
When you look at the Towers of the Virgin, starting from the left, you can see the West Temple. Next to it is the Sundial, and, then the Towers of the Virgin, followed by the Altar of Sacrifice.
Some visitors claim they can see the Virgin Mary’s shrouded figure on the central peak’s face.
It is said that this collection of peaks is best viewed early in the morning.
INTREPID’S PRO TIP: My recommendation is to arrive at the Zion Human History Museum as early in the morning as possible. I would say claim your spot and have your equipment set up at least 30 minutes before sunrise.
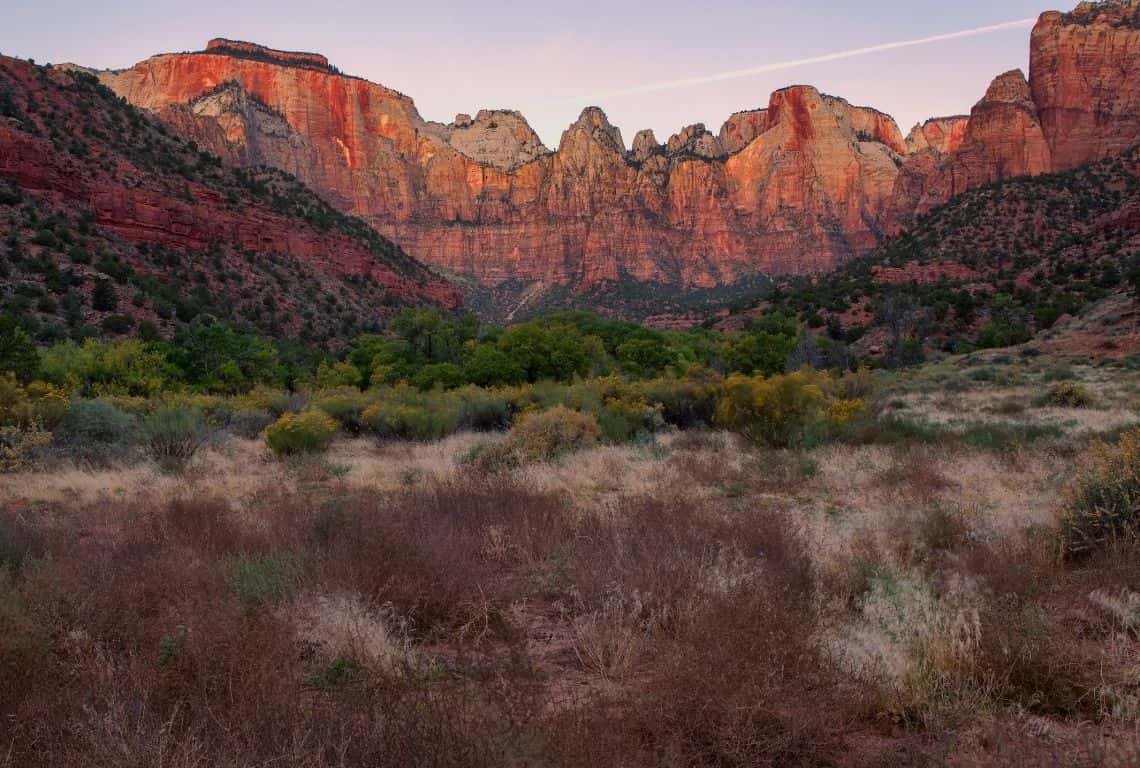
Towers of the Virgin Right Before Sunrise
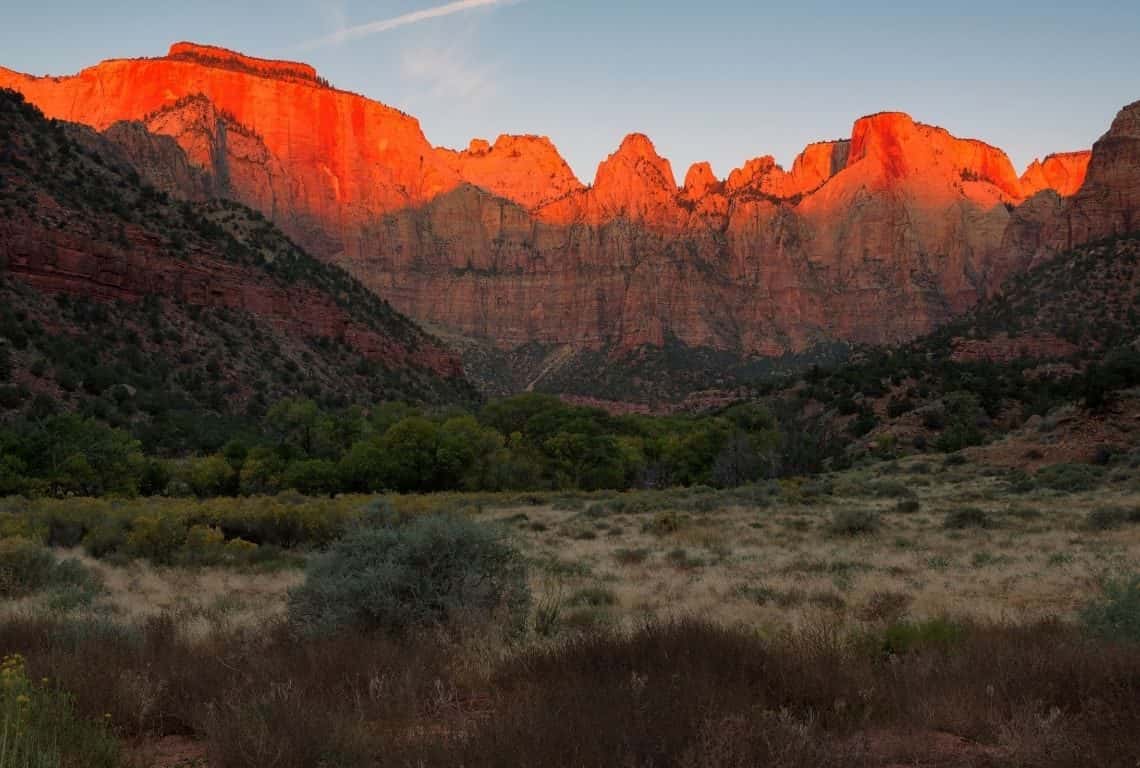
Towers of the Virgin at Sunrise in Zion National Park
Another good time to head to the Zion History Museum is way before sunrise. When there is barely any light. It is when the sun is still at a significant depth below the horizon and the light takes on a blue shade.
It is not a set rule but set the aperture to somewhere between around f/9 and f/14. Then, keep to ISO 100 or 200.
Finally, the shutter speed should be about five seconds to let enough light in.
Above all, be patient and experiment.
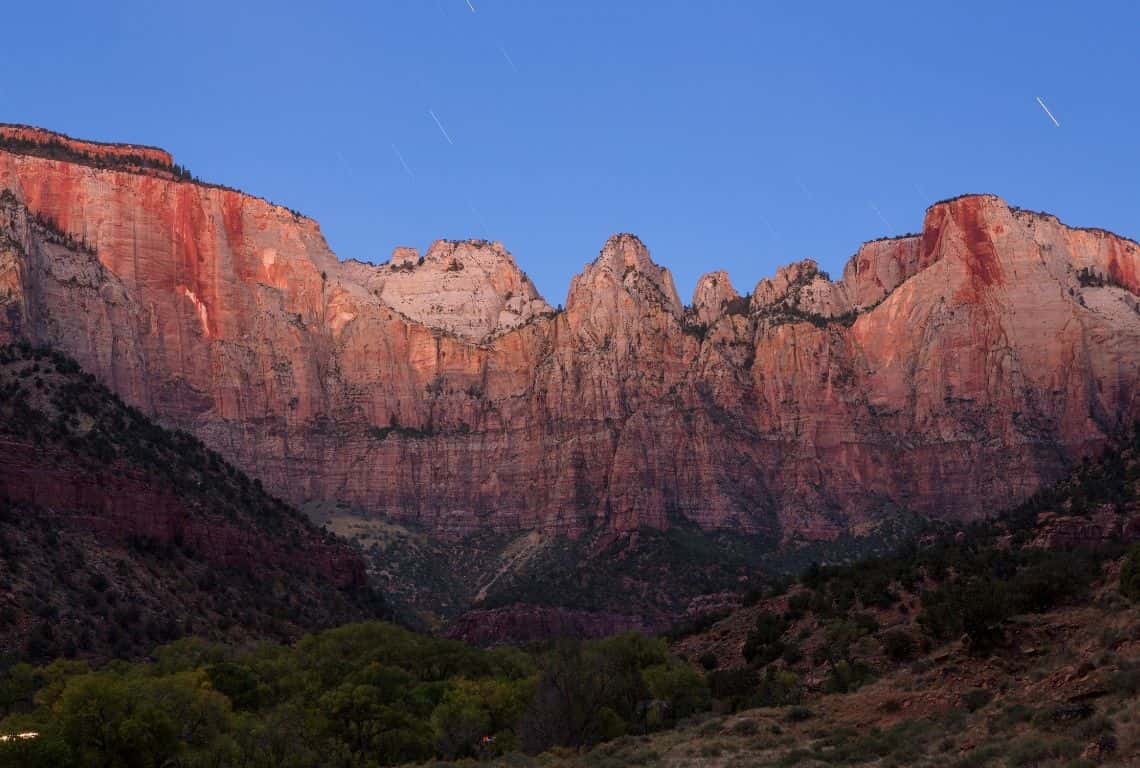
Towers of the Virgin during the Blue Hour
Court of the Patriarchs - Zion's Most Inspiring Landmark to Photograph
The Court of the Patriarchs is a famous landmark that you should not miss and make sure that you photograph it in Zion National Park. If you are into landscape photography then you will really appreciate how the Court of the Patriarchs captures the spirit of the outdoors.
GOOD TO KNOW: To get to the Court of the Patriarchs, you can take the shuttle and get off at the Court of Patriarchs, which is shuttle stop # 4.
If the shuttle temporarily does not stop at # 4, then get off at stop # 5 and take a leisurely walk (south) to the Court of Patriarchs.
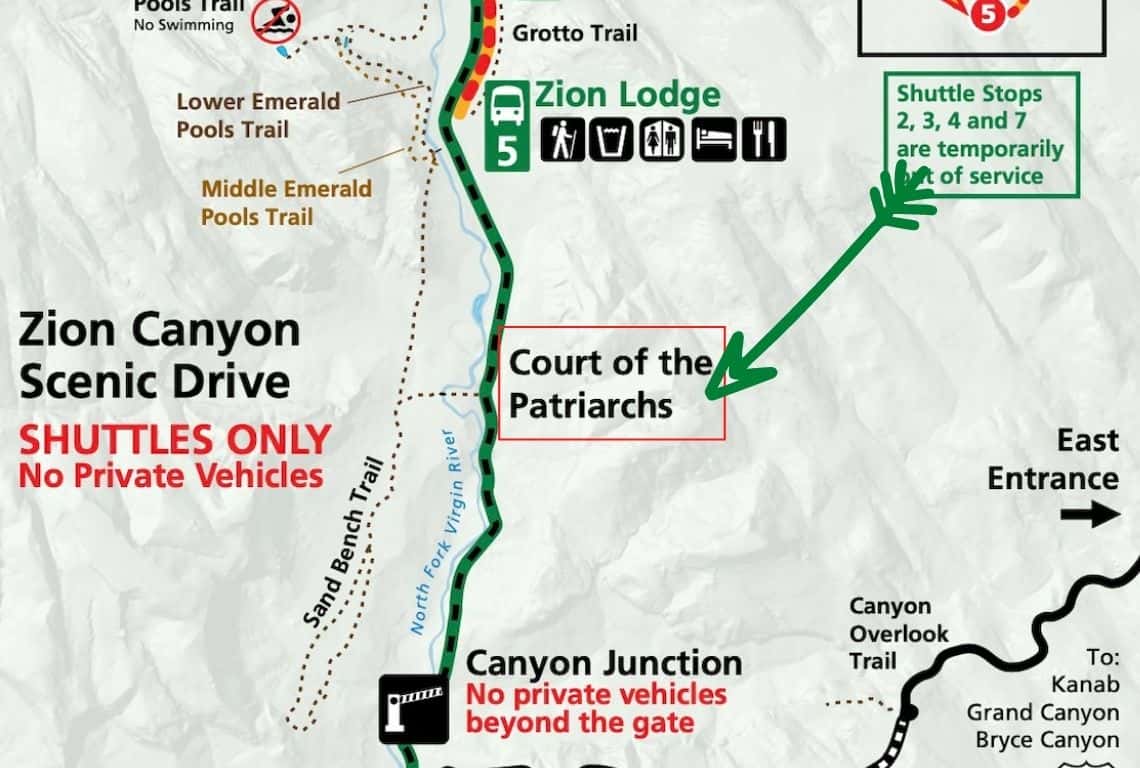
Map of Court of the Patriarchs in Zion National Park. Image Credit: NPS
The Court of the Patriarchs is a grouping of sandstone cliffs named after the biblical figures of Abraham, Isaac, and Jacob.
INTREPID’S PRO TIP: I recommend that you take a short hike starting at Shuttle stop # 4. It is not much of a hike, but it will give you more elevation and an opportunity to take better pictures.
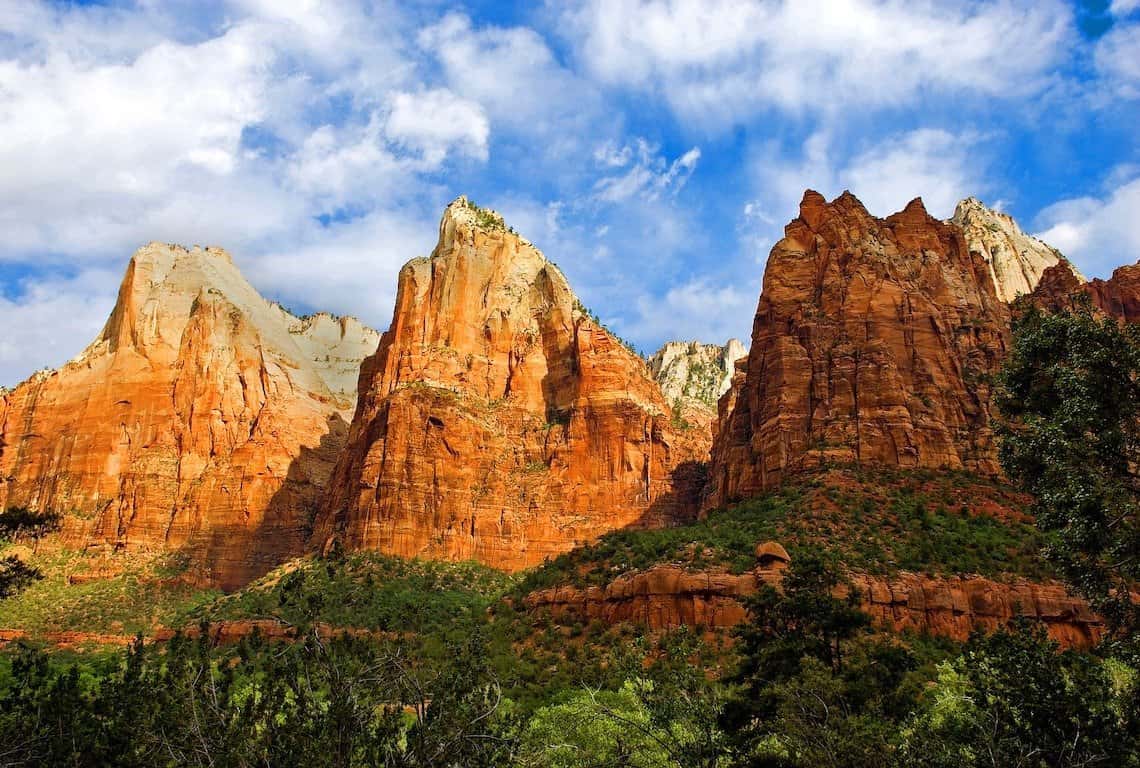
Court of the Patriarchs in Zion National Park
Angels Landing - Most Popular Photography Location in Zion National Park
Angels Landing is probably the top photography spot in Zion National Park.
If you are adventurous and fit for a strenuous hike then take Angels Landing Trail for the most iconic photographs of Zion Canyon.
If you are visiting the park between the months of March through October, then you will have to use the shuttle. No private vehicles are allowed inside the park.
By the same token, the shuttle is free. Your park entrance ticket covers the cost of the shuttle. The shuttle operates in Springdale, Utah, as well as inside the park.
To get to the start of Angels Landing Hike, get off at the Grotto, which is shuttle stop number 6.
INTREPID’S PRO TIP: Always check Zion National Park’s Website for the most recent updates on trail closures and changes to shuttle operating hours before planning your visit.
In response to concerns about crowding and congestion on the trail, on and after April 1, 2022, everyone who hikes Angels Landing needs to have a permit. Find out how to get the permit HERE.
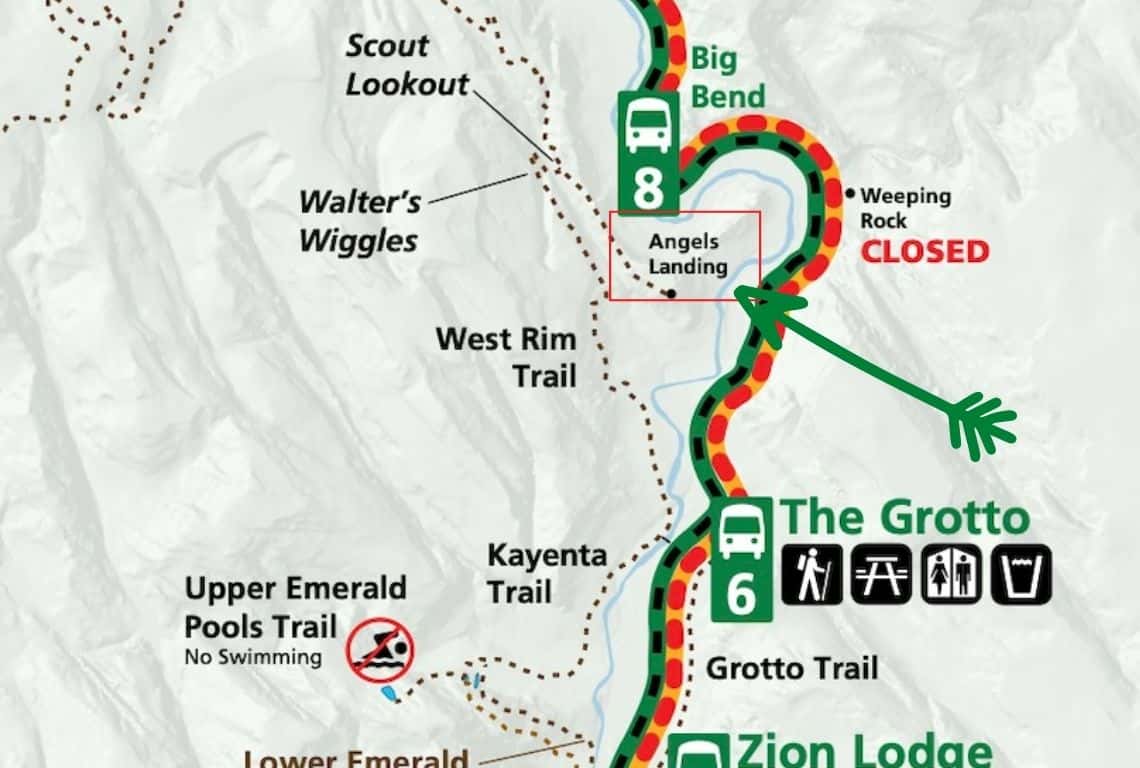
Map of Angels Landing Trail in Zion National Park. Image Credit: NPS
Even though Angels Landing is a strenuous and scary hike, it is one of the most popular hikes in Zion National Park. With that being the case, do not expect any solitude on this hike. You will have plenty of company along the way. And, once you get to Angels Landing, you will have to wait in line to take some pictures.
However, it is all worth it! Hands down, the views at Angels Landing are awesome and it is one of the best photography locations in Zion.
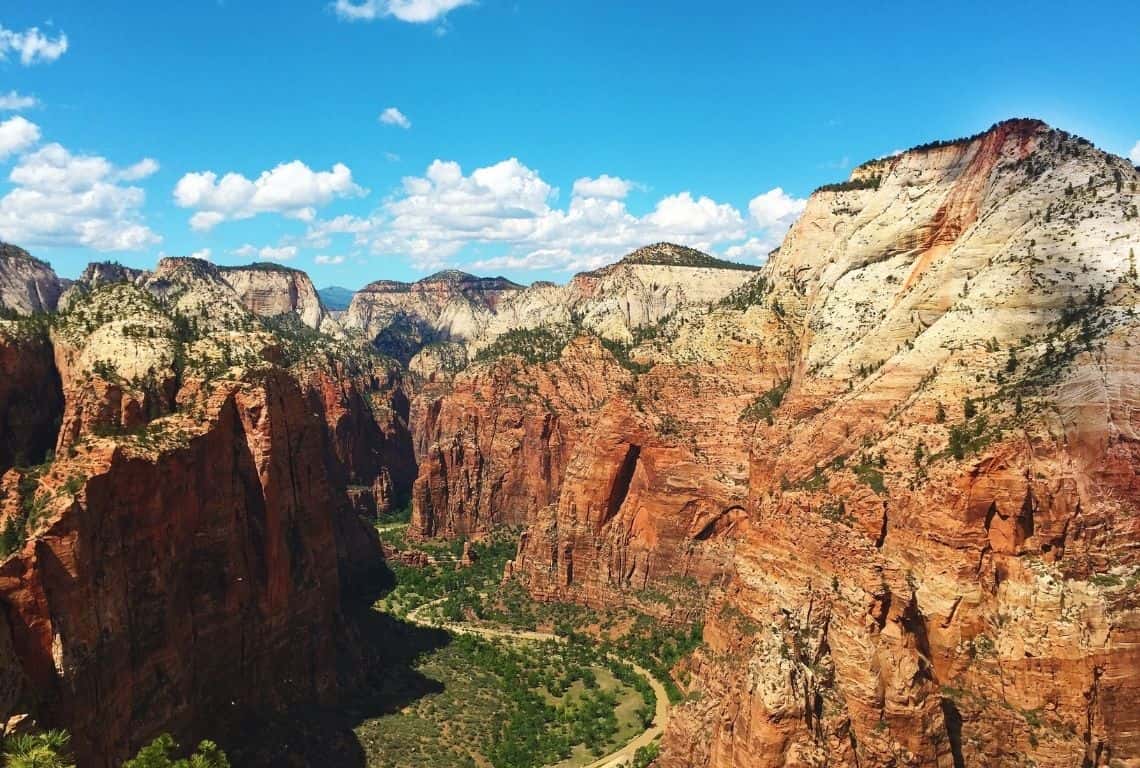
View from Angels Landing in Zion National Park
Observation Point - Zion Canyon Top Photography Location
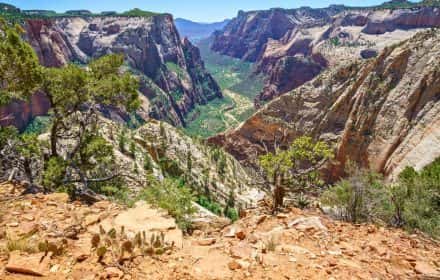
Hands down, Observation Point is the top spot to photograph the entire canyon in Zion National Park. However, it requires some hiking along Observation Point Trail.
If you are up for a strenuous hike, then you will be rewarded with the most stunning 360-degree views.
If you are using the shuttle, then get off at Weeping Rock, which is shuttle stop number 7. Weeping Rock is the starting point for the Observation Point Trail.
GOOD TO KNOW: The Observation Point Trail is 8 miles round-trip. It takes about four to six hours to hike from Weeping Rock trailhead to Observation Point and back.
Always check Zion National Park’s Website for the most recent updates on trail closures and changes to shuttle operating hours before planning your visit.
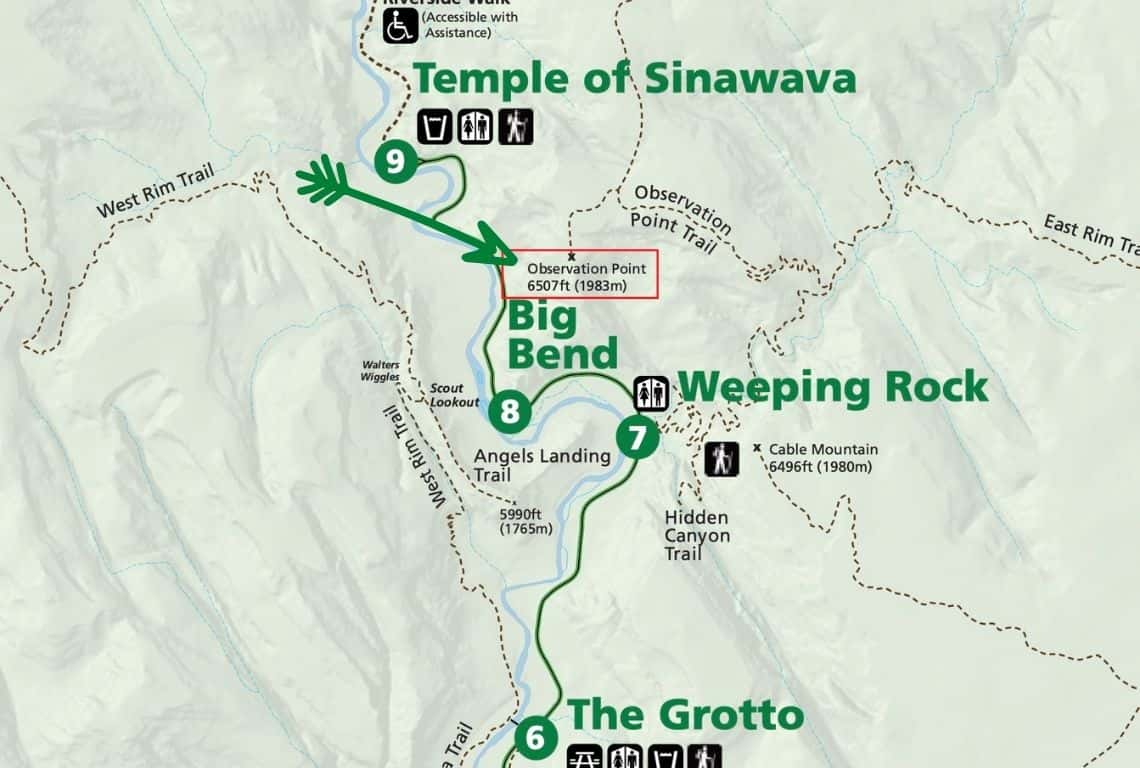
Map of Observation Point Trail in Zion National Park. Image Credit: NPS
What I like about Observation Point Trail is that it is not as busy as the Angels Landing Trail. You will get to enjoy some peaceful moments on this trail, plus you will not have to wait in line to take some photos.
If you are up to it, then consider getting to Observation Point at sunrise (be there before sunrise!). Honestly, it is the best experience ever and the view of Zion Canyon bathed in these soft warm colors is just breathtaking! In my opinion, it is one of the best sunrise spots in Zion National Park.
So if you look at the picture below, to your right will be the West Rim Trail and the inspiring Angels Landing. A little farther down the canyon, you will be able to see the Three Patriarchs. On the left will be the East Rim, Cable Mountain, Great White Throne. Far down the canyon, you will be able to see the Watchman.
And, right below you will be the valley with the Virgin River going around the Organ and the Angels Landing and forming the Big Bend.
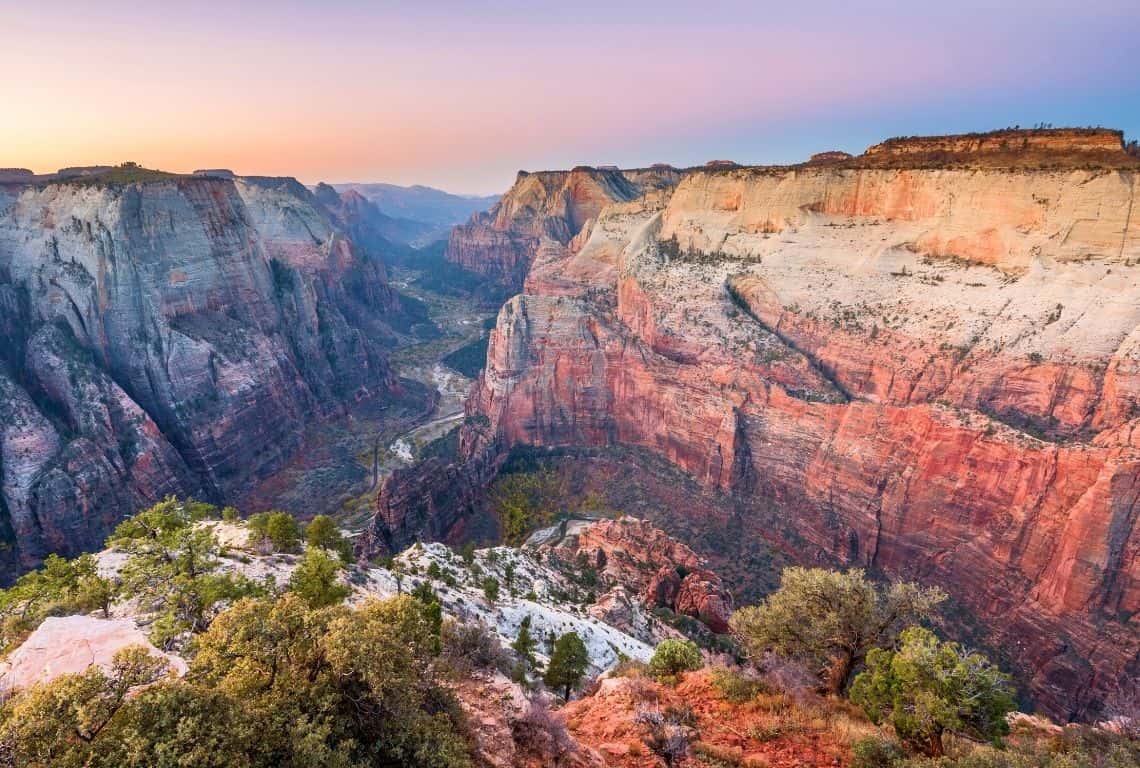
Observation Point in Zion National Park at Sunrise
Zion Narrows - Zion's Most Famous Photo Location
The Zion Narrows Trail in Zion National Park is no doubt the most famous location that needs to be on your list of places to photograph in Zion.
However, the Zion Narrows Trail is one of the most challenging spots in photographing Zion National Park. Why? Notably, you are hiking the Virgin River upstream.
The river is your trail!
And, yes, the water is cold and the current is strong. And, you are hiking in knee-deep to sometimes waist-deep water. The riverbed has sections of sand and sections of slippery rocks. So, you need to prepare, because it is a challenging location.
However, what is really neat about this trail, is that you are hiking in the canyon where in some areas the walls rise up to more than 1,000 feet, however, they are only 20 feet apart.
Conversely, the rewards are great! You will see waterfalls, huge boulders, hidden canyons, hanging gardens, and so much more.
GOOD TO KNOW: The Zion Narrows Trailhead is located at the North End of Riverside Walk. To get there, you will start at Temple of Sinawava and take Riverside Walk, and have your camera ready because along the way you will have plenty of photo opportunities.
The end of Riverside Walk is the Zion Narrows Trailhead.
Now, what you need to know is that you will get the best photo opportunities once you reach a section of the Zion Narrows called Wall Street.
By the way, just to give you an idea, the following are the distances between each section of the Zion Narrows Trail:
- Gateway to the Narrows (end of Riverside Walk) to Mystery Falls – .5 mile
- Mystery Falls to Wall Street – 1.25 miles
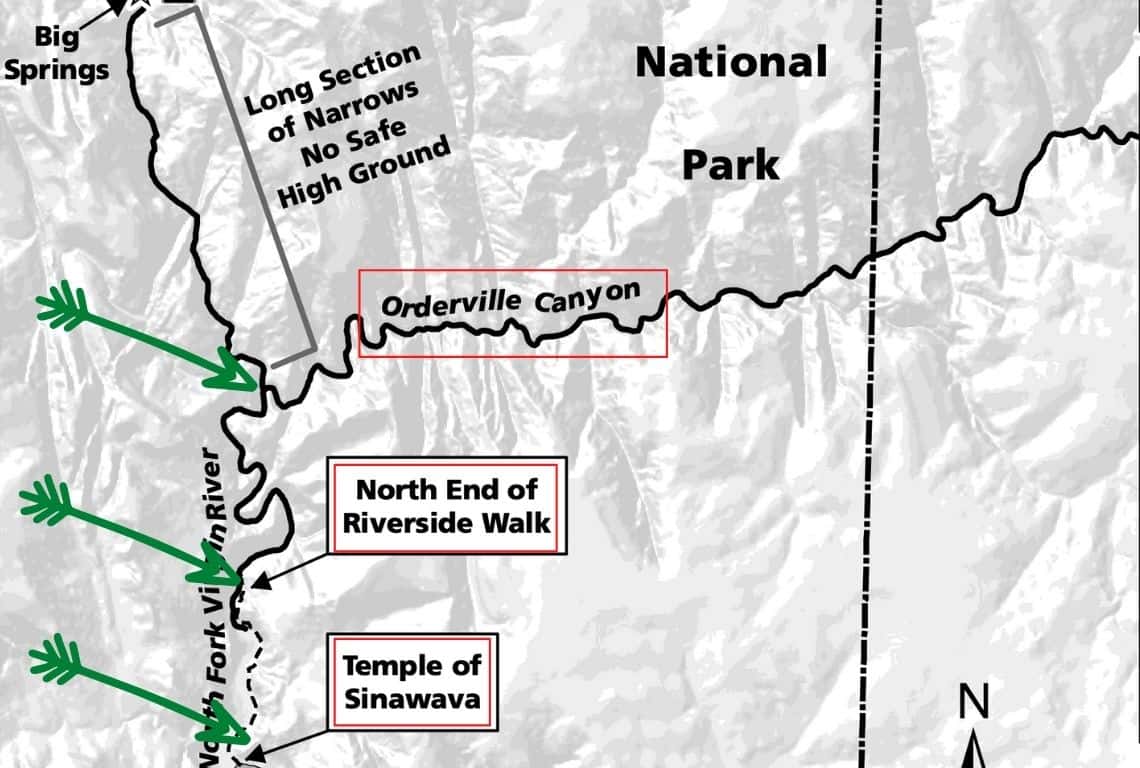
Map of Zion Narrows in Zion National Park. Image Credit: NPS
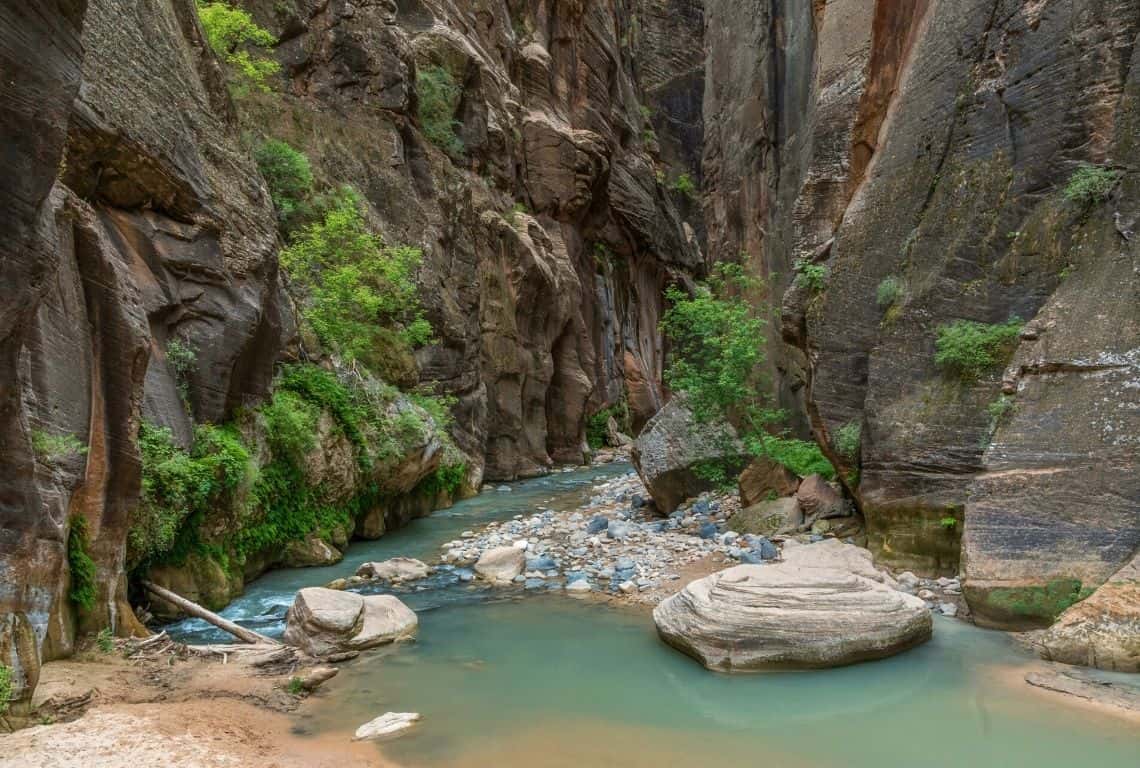
Zion Narrows in Zion National Park
The Zion Narrows Trail is a very popular hike. You will have a lot of company along the way and it will be challenging to get any pictures without people in them. So, start early.
Next, make sure to buy a dry bag to protect your camera and your valuables. Finally, you need to have a hiking stick or hiking poles. The stones in the riverbed are slippery. In addition, it is hard to see the bottom of the river. And, lastly, review my post to get all the details.
The photo opportunities along the Zion Narrows Trail are endless. You will end up with breathtaking photos!
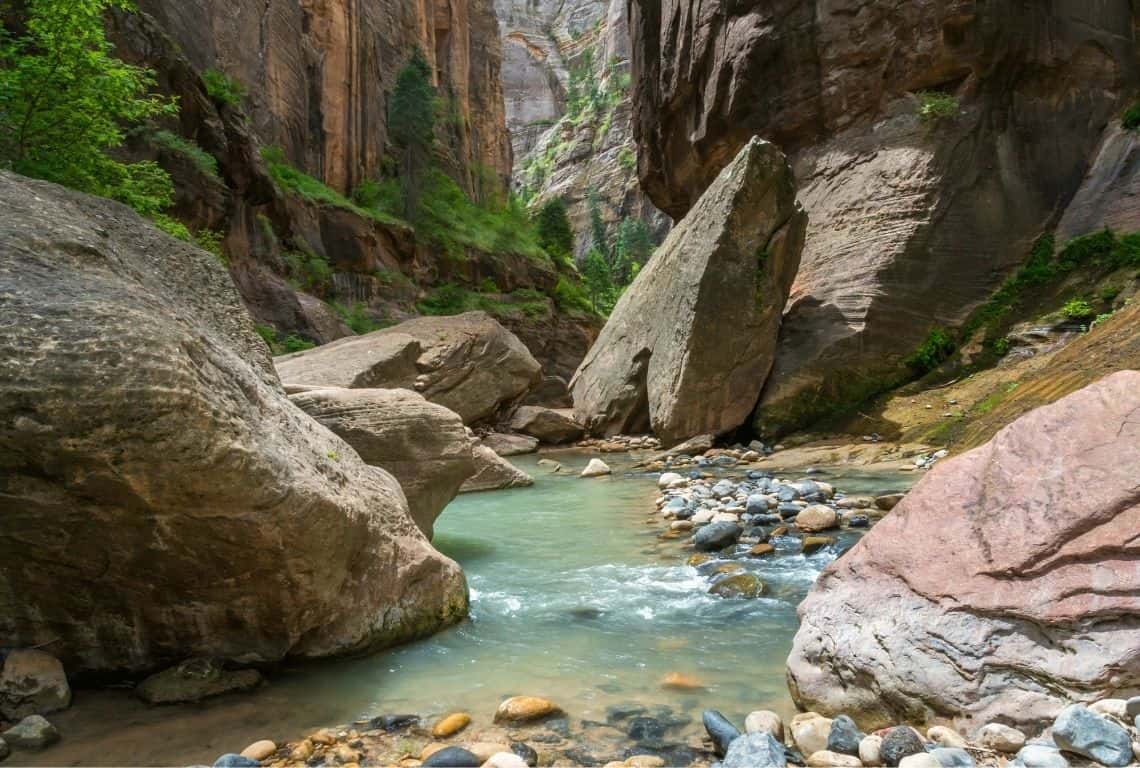
Zion Narrows in Zion National Park / Best Photography Locations in Zion
INTREPID’S PRO TIP: I just want to stress again, how important it is to always check Zion National Park’s Website for the most recent updates on trail conditions and closures and changes to shuttle operating hours before planning your visit.
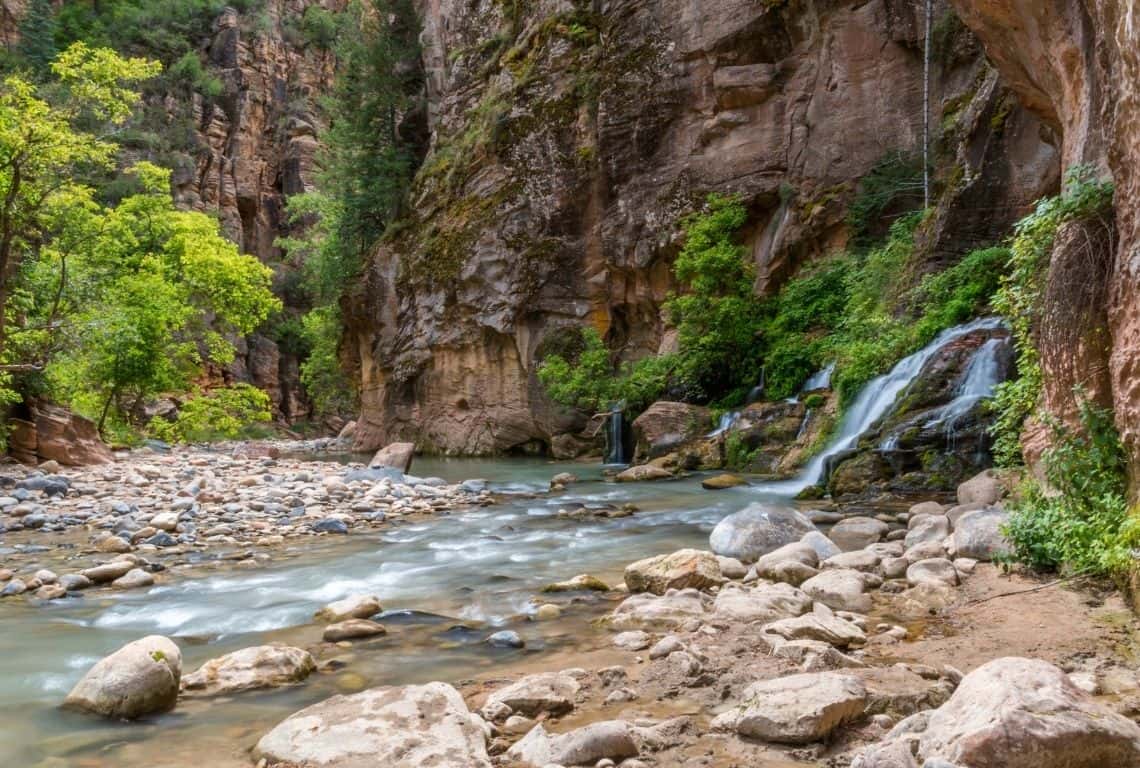
Zion Narrows in Zion National Park / Best Photography Locations in Zion
INTREPID’S PRO TIPS: How to photograph the Zion Narrows? Honestly, just experiment and practice. The following are just a few tips that might help you achieve the desired effect:
- Use HDR: Have you ever created HDR images? Well, the Zion Narrows is a good place to give it a try. At the most basic level, an HDR photo consists of several photos taken at different exposure levels and then mashed together with software to create a better picture.
- Use Tripod: There is not much light in the canyon, so you will need a tripod.
- Use Low ISO Setting: ISO refers to how sensitive your camera’s sensor is to light. A high ISO value (e.g. 800, 1600 or higher) means a high sensitivity to light. This helps in low-light situations where you need the camera to capture more light for a better-exposed image.
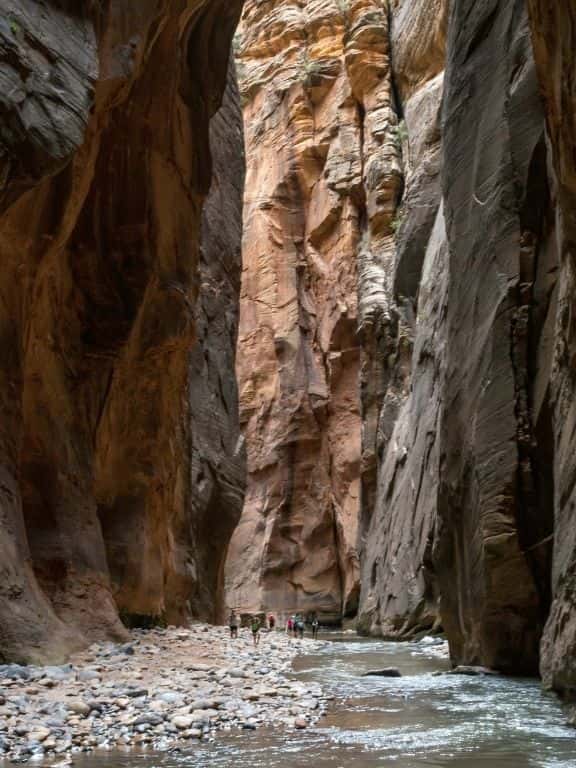
Hiking Zion Narrows in Zion National Park.
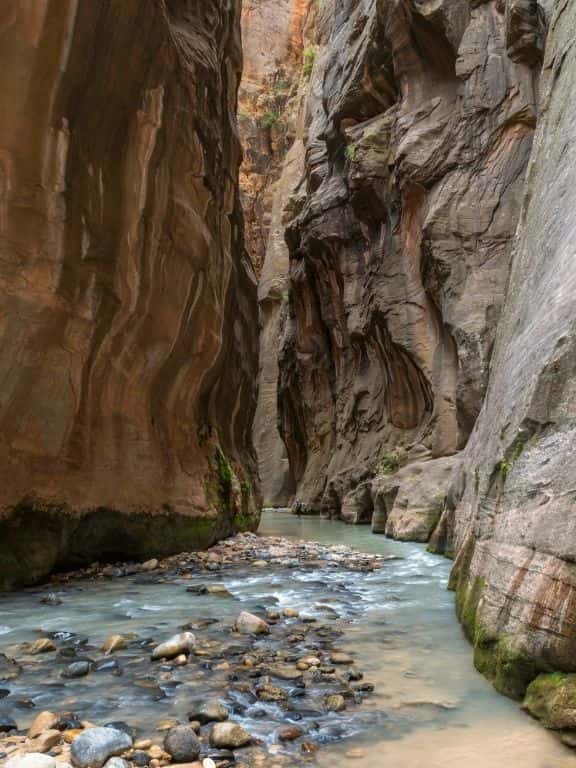
Hiking Zion Narrows in Zion National Park.
Emerald Pools - Most Scenic Place to Photograph in Zion
Emerald Pool Trail is an amazing trail where you can photograph three beautiful pools and (depending on the time of the year) two magnificent waterfalls.
What is really cool about this trail is that takes you right under the waterfalls along an alcove. And, you can take really awesome pictures of the waterfalls as they pour down into the pools.
GOOD TO KNOW: The Emerald Pools Trailhead is located right next to Zion Lodge.
If you are taking the shuttle, then get off at shuttle stop # 5. Next, cross the footbridge and continue on Emerald Pools Trail the trail along the Virgin River.
Important: Emerald Pools Trail often experiences rock slides. Make sure to check Zion National Park’s Website for the most recent updates on trail conditions.
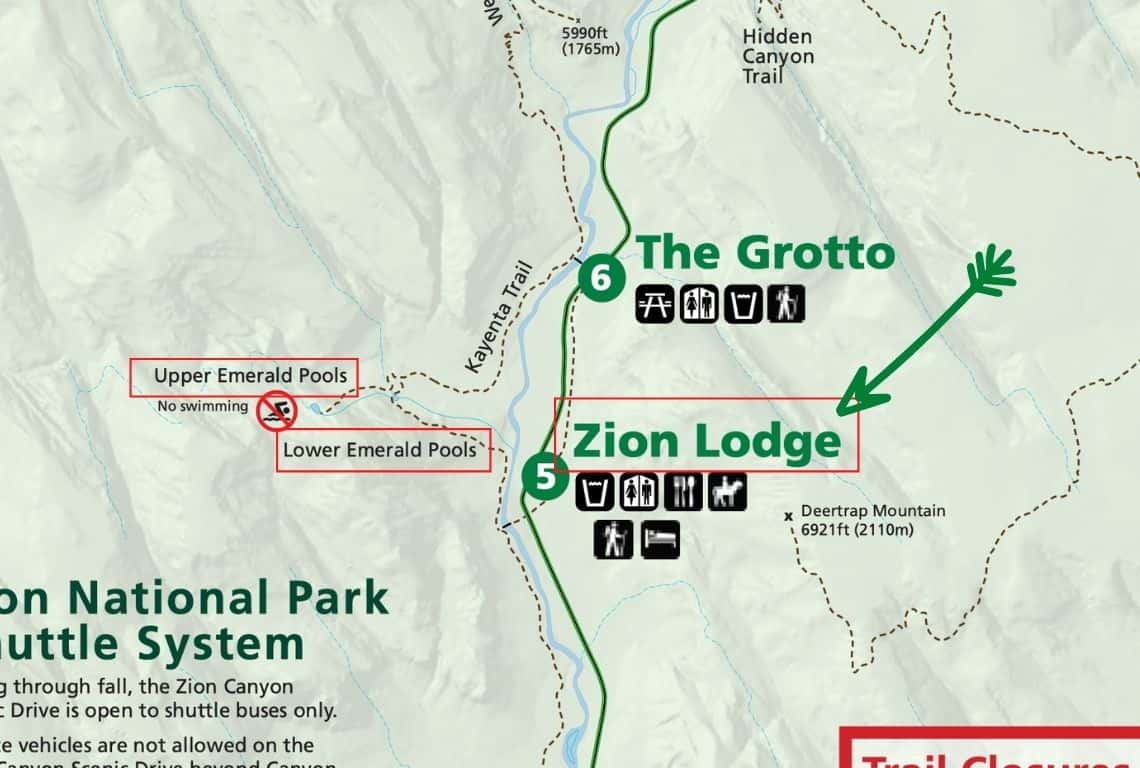
Map of Emerald Pools Trail in Zion National Park. Image Credit: NPS
Now, what you need to keep in mind is that the waterfalls are reduced to basically nothing during the summer months.
The best to see and photograph the waterfalls and the pools is either during the spring months. However, heavy rains do occur in Zion National Park, especially during the monsoon season, which is at the end of summer (between late July and mid-September). Hands down, the best time to take great pictures of the waterfalls and the pools is right after heavy rain.
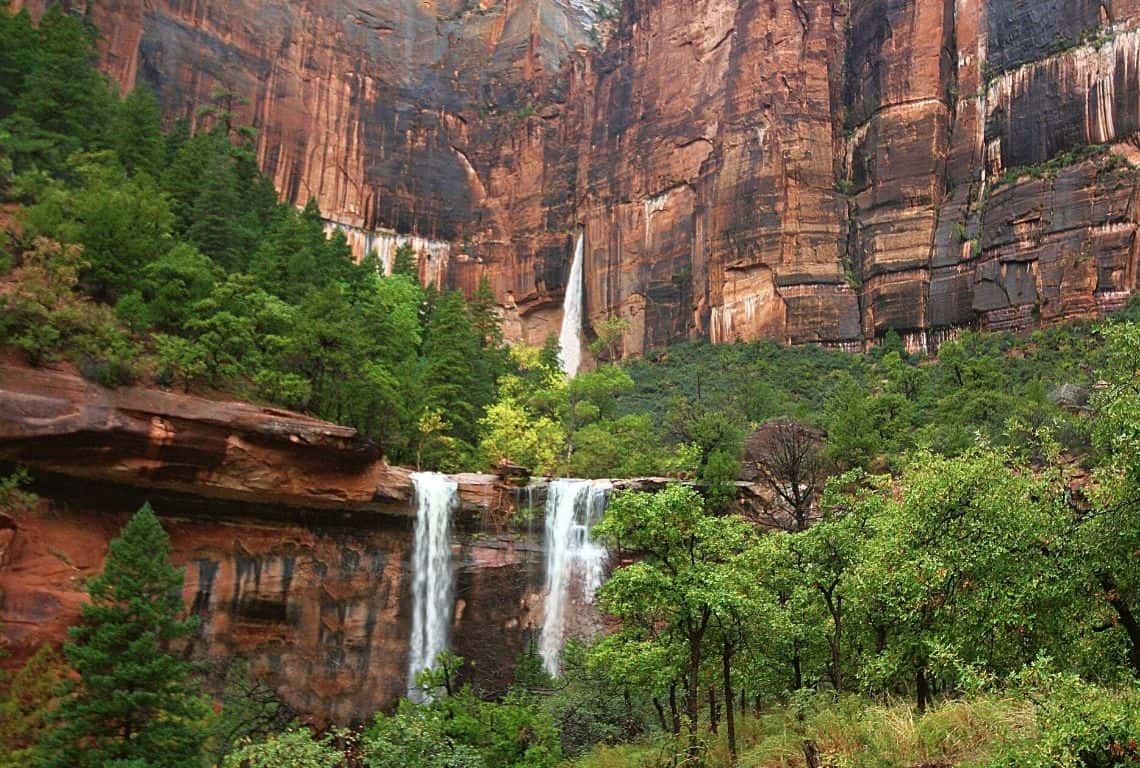
Emerald Pools Trail in Zion National Park
Zion National Park Photography Guide
- Arrive Early to Photograph Sunrise or Sunset in Zion National Park
Arrive way before sunrise or sunset to secure a good spot. It gets crowded at all the popular viewpoints, especially in the summertime. Also, keep in mind that the best light will happen shortly before sunrise or shortly after sunset, and it is known as the Golden Hour. The light is warmer and softer and there are no sharp shadows during the Golden Hour.
Second, make sure to use a long exposure selection on your camera.
How do you do a long exposure? Simply, turn your camera’s mode dial to Manual and use a slow shutter speed (5-30 seconds) for a longer exposure. Additionally, use your camera self-timer to take a photo.
- Include Foreground, Middleground, and Background in Your Photos
Zion Canyon is vast and getting a sense of scale can be a bit challenging. The best to overcome that hurdle is to find a strong foreground. For instance, try finding a tree, or a protruding rock. And, then work on focusing on middleground, and background to give your photo a nice 3-dimensional perspective.
- Bring a Tripod to Photograph Sunrise and Sunset in the Zion National Park
Having a tripod will help you minimize the risk of any movement while you are capturing longer exposures and allowing more light to enter the camera.
- Photograph Zion at Night
Zion is one of the best photography locations for nighttime images. Taking photos at night can be challenging. So, be patient and practice. It takes time to capture great images of the sky at night. And, it takes a lot of experimenting with the camera settings.
Follow these nighttime photography rules:
- Have the camera on manual mode on a sturdy tripod. Turn off image stabilization.
- Have a wide-angle lens between 14mm to 24mm to get a good view of the Milky Way in the frame along with the foreground.
- Set the aperture to the widest – at least f2.8, but if you have only the kit lens, use it at 18mm / f3.5.
- Start with the lowest ISO possible, about 1600. Depending on the result, you can decrease further or increase the ISO up to 3200, above which the image quality can start to deteriorate.
- Put your lens on manual focus and focus on the brightest star in the sky. Zoom in on live view and turn the focus ring till the star shows up as a bright point on the screen.
- Use the mirror lockup feature if using a DSLR to avoid blur due to camera movement.
Intrepid Scout's Tips for Best Photography Locations in Zion National Park
Let me know if you have your favorite Zion National Park photography spot and I will add it to the list of the most Instagram-able places in Zion National Park.
Here are a few tips for Zion National Park photography:
- Do not expect any solitude at any of these photography locations in Zion National Park. You will have plenty of company!
- If you plan on taking pictures at sunrise or sunset, then you need to plan accordingly. First of all, check sunrise and sunset times. Next, check the weather conditions. Finally, allow enough time to get to the best sunrise and sunset photography locations. My recommendation is to arrive at least 30 minutes before sunrise or sunset, just in time for the Golden Hour.
- It can be very cold in the morning even during the summer months. So, make sure to dress warmly and dress in layers. Check the weather forecast as well. The weather can change within a few hours, so be prepared.
A trip to Zion National is perfectly paired with a side trip to Bryce Canyon National Park, Grand-Staircase Escalante National Monument, or Canyonlands, Capitol Reef National Parks.
Check out my post: Zion to Bryce Canyon: 3-Day Adventure (with Maps and Photos)
More Helpful Posts About Zion National Park:
One Day in Zion National Park (Itinerary+Maps+Tips)
Complete Guide to Zion National Park – 13 Tips for First Visit
13 Great Hikes in Zion National Park You Need to Explore
7 Easy Hikes in Zion National Park with Stunning Views
How to Hike Angels Landing in Zion National Park
How to Hike Observation Point Trail to Zion’s Best View
The Ultimate Guide to Hiking The Narrows for Beginners
6 Enchanting Towns And Cities Near Zion National Park (with Best Places to Stay and Eat)
You Might Also Like:
Zion to Bryce Canyon in 3 Days (Itinerary Ideas+Useful Tips)
Did You Find This Post Useful?
Why Not Save Best Photography Locations in Zion Your Pinterest Board!
Now, It Is Your Turn, I Would Like to Hear Back from You!
Are you planning your trip to Zion National Park? Please let me know! Drop me a quick comment right below!
Click on any of the images below to get inspired and to help you with the planning process for your trip to Zion National Park!
Comments:
4 thoughts on “8 Best Photography Locations in Zion National Park (+Useful Photo Tips)”
very helpful information!
I am glad you found it useful!
I am reading that you must ride the shuttle to the stops. If the shuttle starts at 6am, will I make it to any of the stops before sunrise?
Hi Megan,
The shuttle is one option to get around the park (when it is operating). However, you can also walk or bike.
When the shuttle is not operating (winter mostly), then you can drive your own vehicle in the park.