This site uses affiliate links, meaning that if you make a purchase through our links, we may earn an affiliate commission.
Arches National Park, located in southeastern Utah, is a photographer’s paradise, boasting a mesmerizing landscape of natural sandstone arches, towering cliffs, and striking rock formations.
Whether you’re a seasoned professional or an enthusiastic beginner, Arches National Park provides endless opportunities to capture awe-inspiring images and create lasting memories.
In this guide, we will explore some of the best photography locations in Arches National Park, highlighting the distinctive features and natural wonders that make them exceptional for photography enthusiasts.
So, grab your camera gear, pack your creativity, and embark on a visual journey through the best photography locations in Arches National Park.
GOOD TO KNOW: The best way to get started exploring Arches National Park is to take the Scenic Drive in Arches National Park, which winds around the park and takes you to some of the best viewpoints.
PRO TIP: If you are planning a trip to Arches National Park, then do not miss a visit to Canyonlands National Park. It is an awesome place to explore! Check out my posts: One Day in Island in the Sky at Canyonlands National Park and One Day in The Needles at Canyonlands National Park (8 Things You Can’t Miss)
Did you know that right in-between Arches and Canyonlands is Dead Horse Point State Park? It is a narrow mesa with 2,000 feet high cliffs and Green and Colorado Rivers below it. Don’t miss it! The views at this place are off the charts: How to Spend One Day at Dead Horse State Park, Utah
- 1. Arches National Park At-A-Glance
- 2. 7 Best Photography Locations in Arches National Park
-
- 2.1. Park Avenue Viewpoint and Trail
- 2.2. Delicate Arch
- 2.3. Courthouse Towers Viewpoint
- 2.4. Balanced Rock Viewpoint and Trail
- 2.5. Windows Section
- 2.6. Devils Garden Trail
- 2.7. Sand Dune Arch Trail
- 3. How to Take the Best Photos at Sunrise or Sunset in Arches National Park
- 4. Intrepid Scout's Tips on Best Photography Locations in Arches National Park
Arches National Park At-A-Glance
- What is Arches National Park Famous For: Arches National Park is of course famous for its arches. It has the densest concentration of natural stone arches in the world. There are over 2,000 documented arches in the park, plus pinnacles, balanced rocks, fins, and other geologic formations.
- Cool Facts About Arches National Park: The entire park used to be underwater! What is now a dry seabed was once a shallow inland sea. When the seawater retreated, it left behind sand that the wind formed into dunes. Those dunes were petrified or turned into the rock that forms the park we know today.
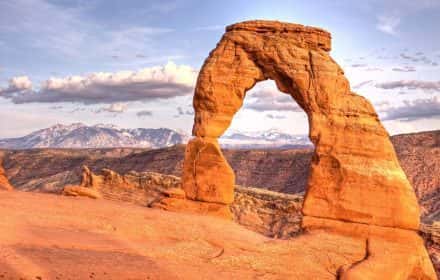
Delicate Arch is the most famous arch in the park and the world. It is a 60-foot-tall freestanding natural arch. The arch is depicted on Utah license plates and a postage stamp commemorating Utah’s centennial anniversary of admission to the Union in 1996. The Olympic torch relay for the 2002 Winter Olympics passed through the arch.
- Best Time to Visit Arches: Hands down, the best time to visit Arches National Park is during the spring or fall months (April or May, and October). The temperatures are mild, the crowds are low, and you can find some solitude in the park, and the weather is just perfect to do some hiking.
- How to Get to Arches National Park: Most people coming to Arches fly into Salt Lake City International Airport (SLC) (230 miles from the park entrance) and then, rent a car and drive. From my personal experience, Salt Lake City International Airport has the least expensive flights.
- How to Get a Timed Entry Ticketed to Arches: A visit to Arches National Park involves a bit of advance planning if you are visiting between the months of April and October. National Park implements a timed-entry system to help manage traffic and improve visitor experiences. It is very important that you reserve your timed-entry ticket as soon as it becomes available! The park releases tickets on a first-come, first-served basis on Recreation.gov three (3) months in advance in monthly blocks.
- How to Get Around in Arches National Park
There is no shuttle service at Arches National Park. The only way to get around the park is by having your own vehicle.
- How Much Does It Cost to Visit Arches National Park
It costs $30 per vehicle, to enter Arches National Park. The entrance pass is good for 7 consecutive days. However, my recommendation is to get America the Beautiful National Park Pass. This $80 pass is valid for 12 months and gets you into all 400+ national park sites!
- Where to Sleep and Eat When Visiting Arches National Park
The best place to stay when you are visiting Arches is Moab, UT. Here are some places that I stay at whenever I am in Moab:
My first choice is La Quinta by Wyndham Moab. I stayed at this place a few times and I have no complaints. It is clean and well managed, and it is conveniently located. If La Quinta is all booked, then my recommendation is to try Mainstay Suites Moab.
The last time that I visited Arches and Canyonlands National Parks, I stayed at Element Moab, and I liked it a lot. It is modern, yet simple, and it has a full kitchen, which is very convenient.
There are lots of dining options in Moab, UT. If you like pasta or pizza then head to Pasta Jay’s. It is a busy place, however, service is fast. Moab Diner is nothing fancy or gourmet, however, it is just good comfort food at a very reasonable price. I like good pizza, so Antica Forma is my place to go to. Their pizza menu is extensive!
7 Best Photography Locations in Arches National Park
Park Avenue Viewpoint and Trail
Hands down, Park Avenue Viewpoint and Trail are my favorite photography location in Arches National Park. The view of the canyon surrounded by jagged walls is absolutely stunning.
Park Avenue Viewpoint and Trail are located about 2.5 miles north of the Visitor Center on Arches Scenic Drive.
The Three Gossips, the Courthouse Towers, Queen Nefertiti and Queen Victoria Rock, the Organ, and the Tower of Babel are all visible from the viewpoint. You will be able to take awesome photos right from the viewpoint.
However, it makes a big difference if you take the trail down to the canyon and photograph these huge formations up close. Park Avenue Trail is a 1-mile one-way easy/moderate trail with a steep decline into the canyon. Once you are at the bottom of the canyon, the trail levels off. However, you will have a fairly strenuous climb on the way back.
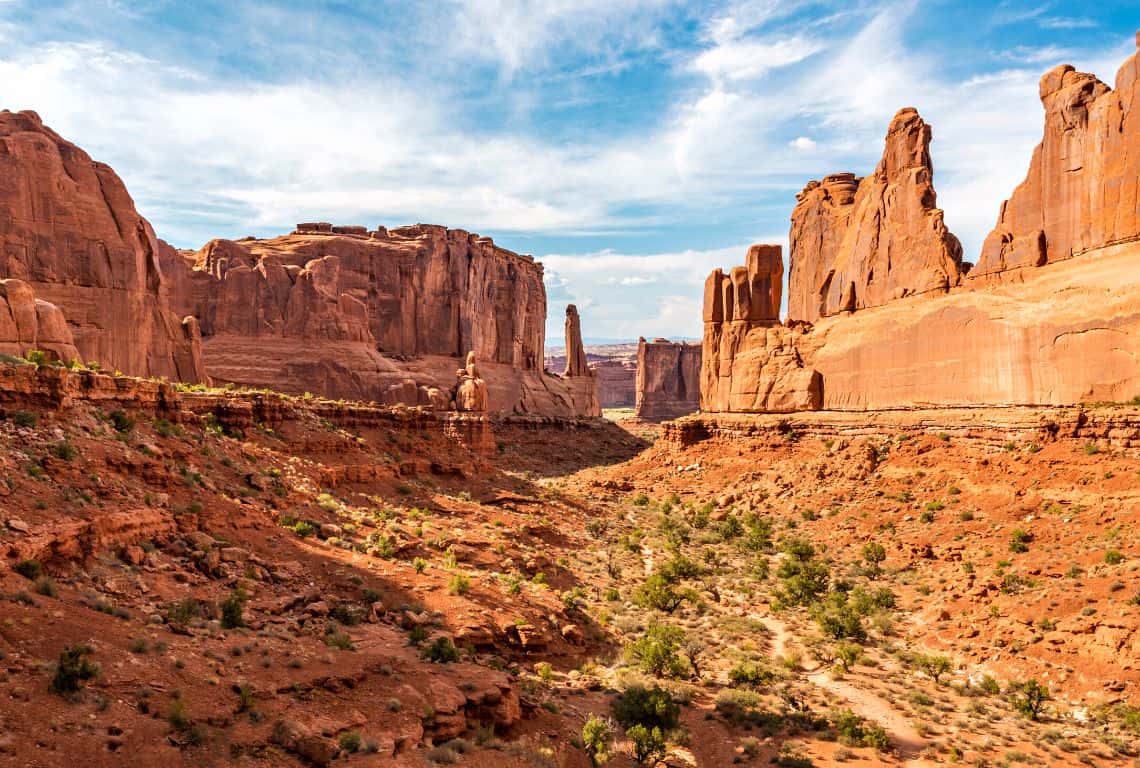
Park Avenue Viewpoint and Trail / Best Photography Locations in Arches
Park Avenue is a great place to photograph at any time of the day, however, my recommendation is to get there in the early to mid-afternoon when the setting sun lights up the canyon and brings out the colors of red and orange.
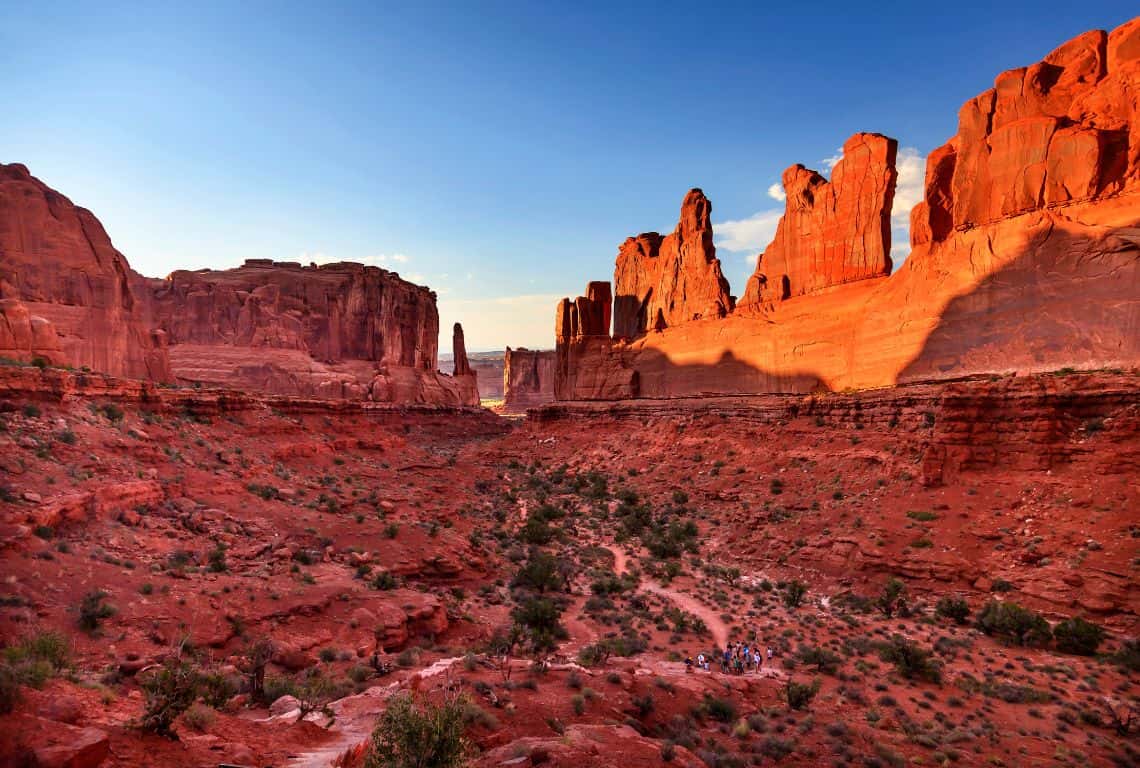
Park Avenue Viewpoint and Trail / Best Photography Locations in Arches
This stunning corridor of towering sandstone monoliths will have you taking tons of photos. Capture the dramatic formations from different angles to showcase their grandeur and unique textures. Experiment with wide-angle lenses to include the entire scene.
Delicate Arch
Delicate Arch is one of the most famous geologic features in the world. It has become the symbol of Utah appearing on many of its license plates.
There are two options to photograph it: you can either take a Delicate Arch Trail (3 miles roundtrip) or you can go to Upper or Lower Delicate Arch Viewpoint (at the end of the road).
Honestly, nothing beats hiking to Delicate Arch and photographing Delicate Arch from the trail and then up close.
To get to Delicate Arch Trailhead follow Arches Scenic Drive. At 9.2 miles from the park entrance, you will get to a junction in the road. Turn right at the junction and follow the signs for Delicate Arch Trail.
The trail to Delicate Arch is fairly strenuous with an elevation gain of 480 feet. For the first half-mile, it is a well-defined trail. Then, it starts to climb at a sharp incline before it levels off toward the top. Just before you get to Delicate Arch, the trail traverses a narrow rock ledge for about 200 yards. Once you are past this last section, you will have the most stunning view of Delicate Arch standing alone in a large natural sandstone bowl at the top of one of the park’s famous fins against the multitude of horizontal planes around it.
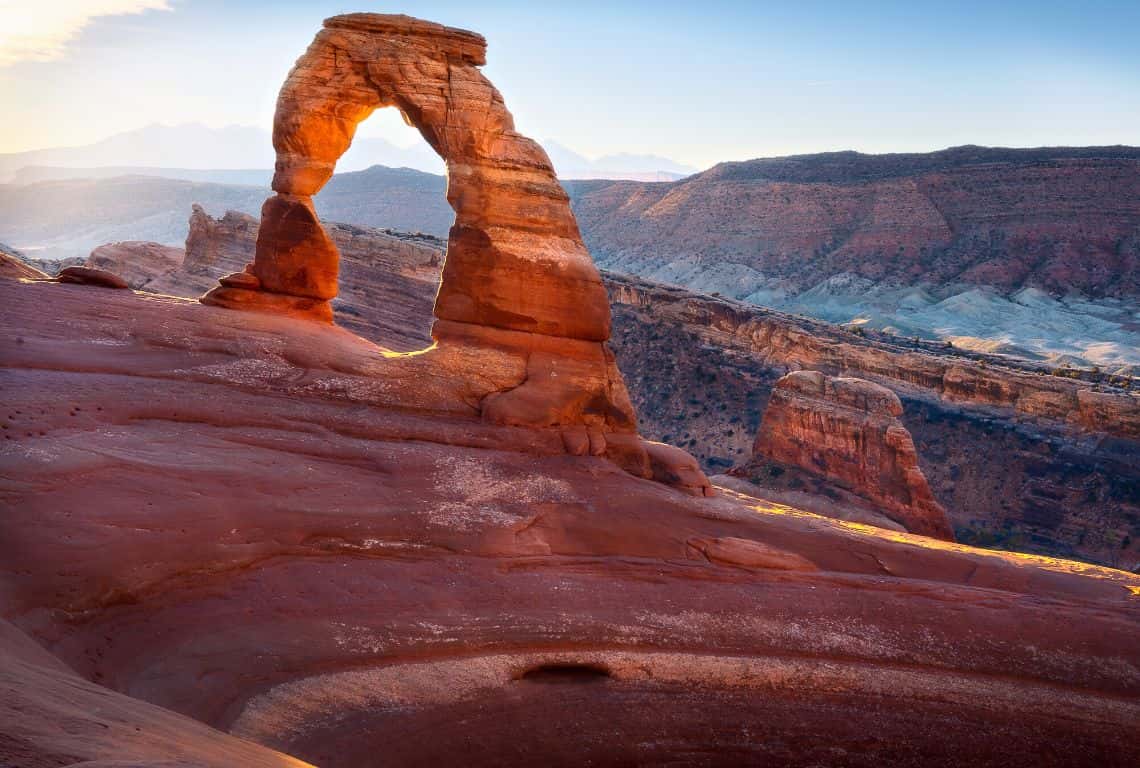
Delicate Arch / Best Photography Locations in Arches
Delicate Arch is best photographed during the Golden Hour, when the daylight is redder and softer.
With that being the case, you will have plenty of company at this popular spot before and at sunset. So, arrive early and secure the best place. Make sure to hang around after the sunset for the Blue Hour, when the sun is significantly below the horizon and the remaining sunlight takes on a blue color.
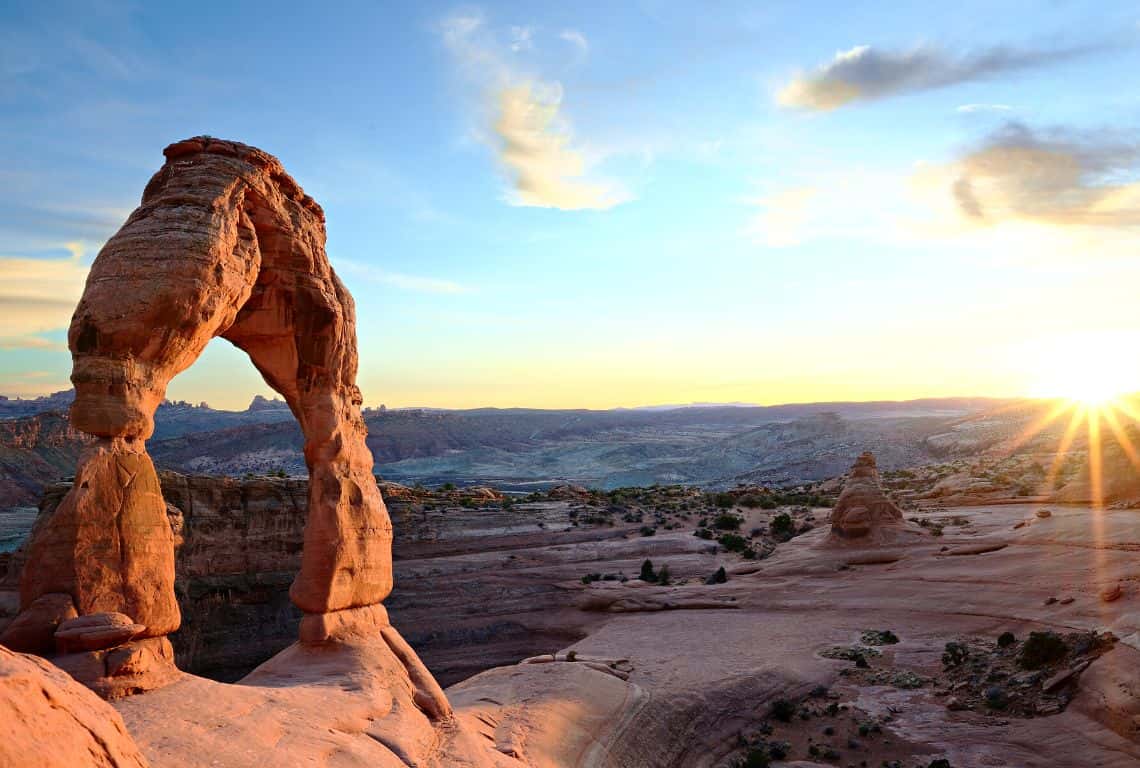
Delicate Arch / Best Photography Locations in Arches
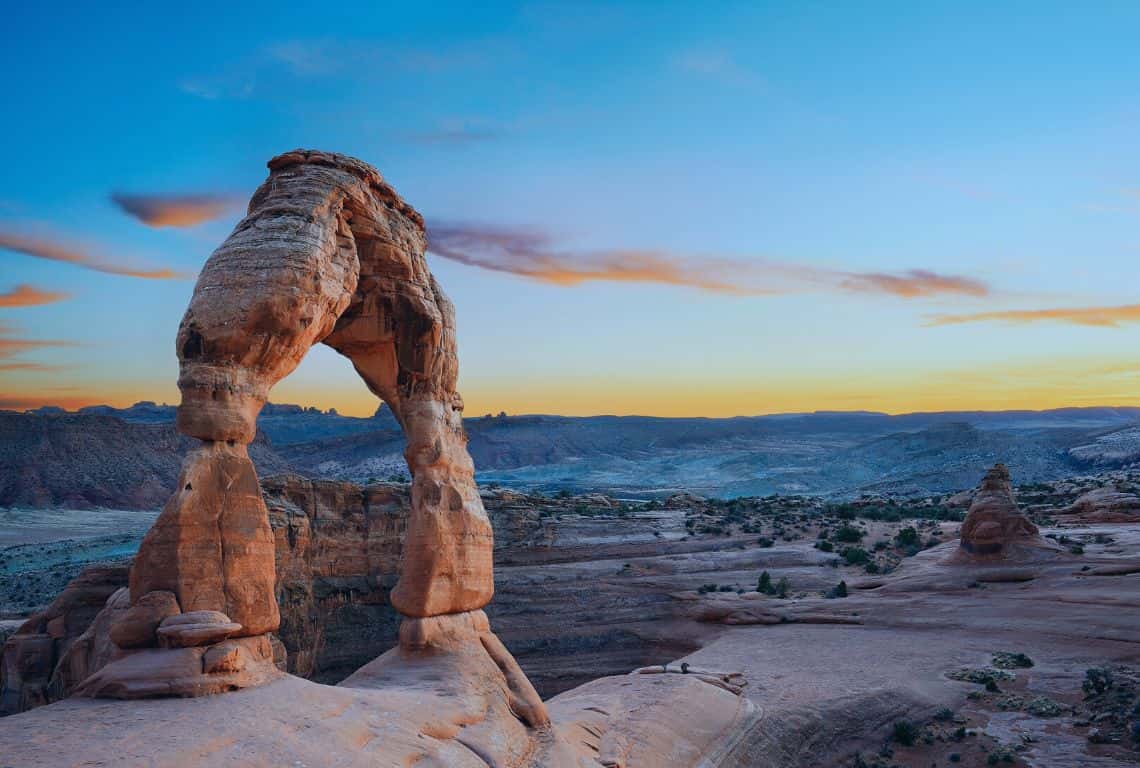
Delicate Arch / Best Photography Locations in Arches
Courthouse Towers Viewpoint
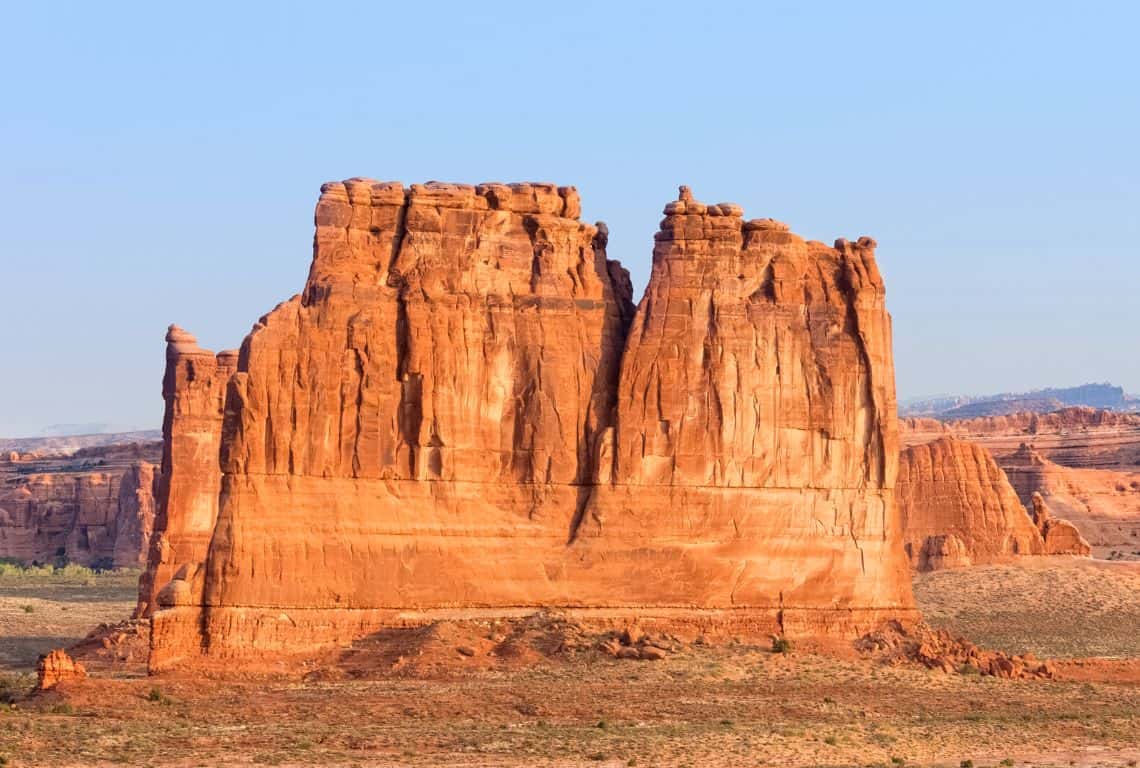
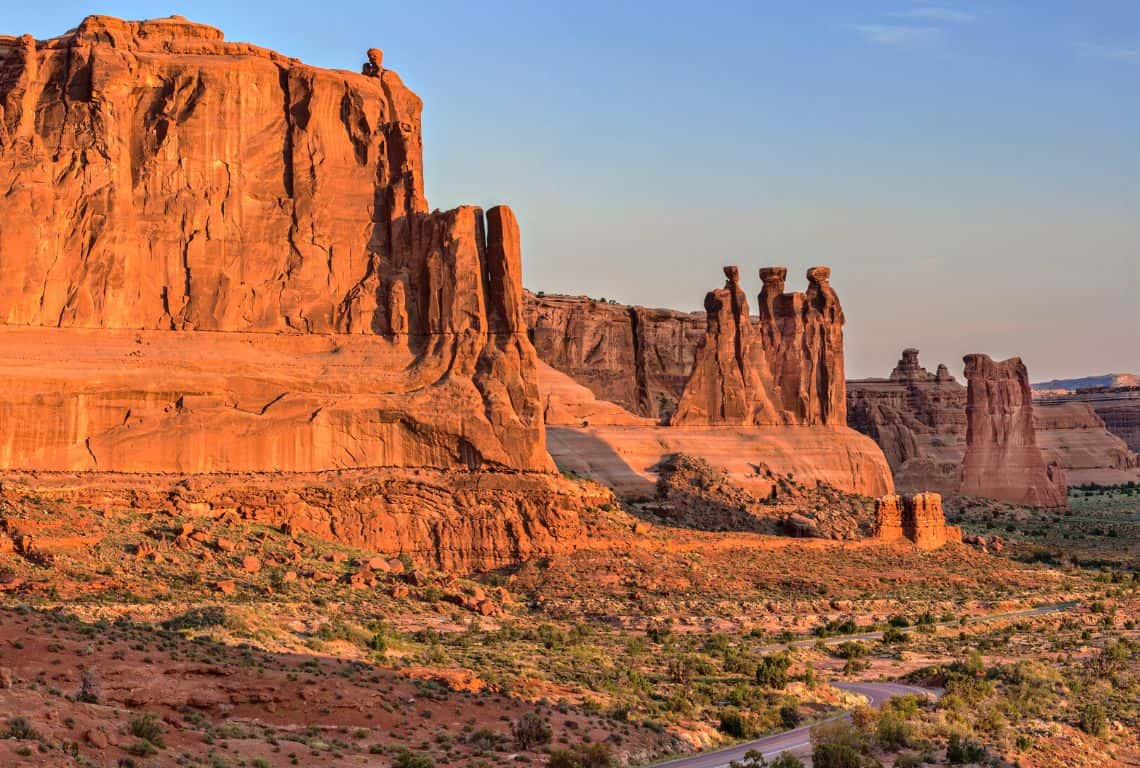
Courthouse Towers Viewpoint is another one of my favorite photography locations in Arches National Park.
Located on Scenic Drive in Arches, just past Park Avenue Viewpoint and Trail, Courthouse Towers Viewpoint is the best photo spot to not only photograph the massive Courthouse Towers jutting out of the desert and flanking the western side of Park Avenue, but also several other famous rock formations like Three Gossips, Sheep Rock, the Organ, and the Tower of Babel.
While Park Avenue is the best to photograph in mid-morning or mid-afternoon, Courthouse Towers, Three Gossips, and surrounding rock formations are the best to photograph shortly after sunrise. They are all in an open area and the first sun rays beautifully illuminate the yellow and orange colors of these rock formations.
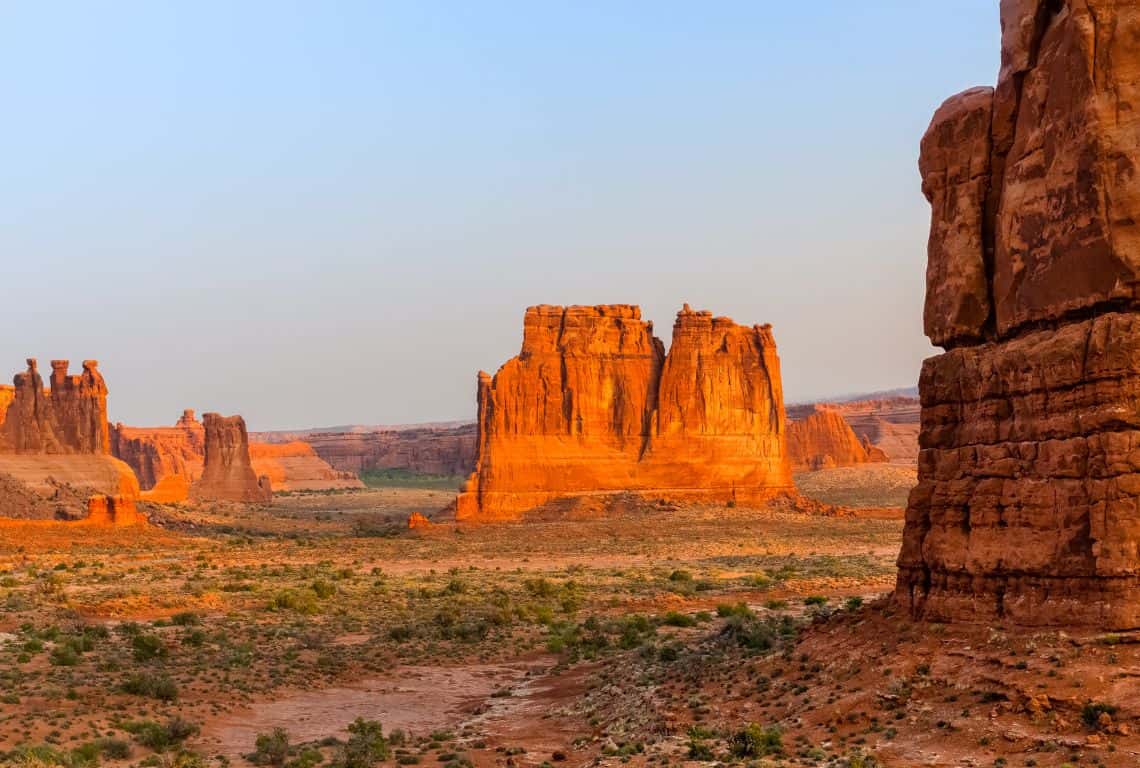
Courthouse Towers Viewpoint / Best Photography Locations in Arches
Courthouse Towers Viewpoint / Best Photography Locations in Arches
Courthouse Towers Viewpoint / Best Photography Locations in Arches
Balanced Rock Viewpoint and Trail
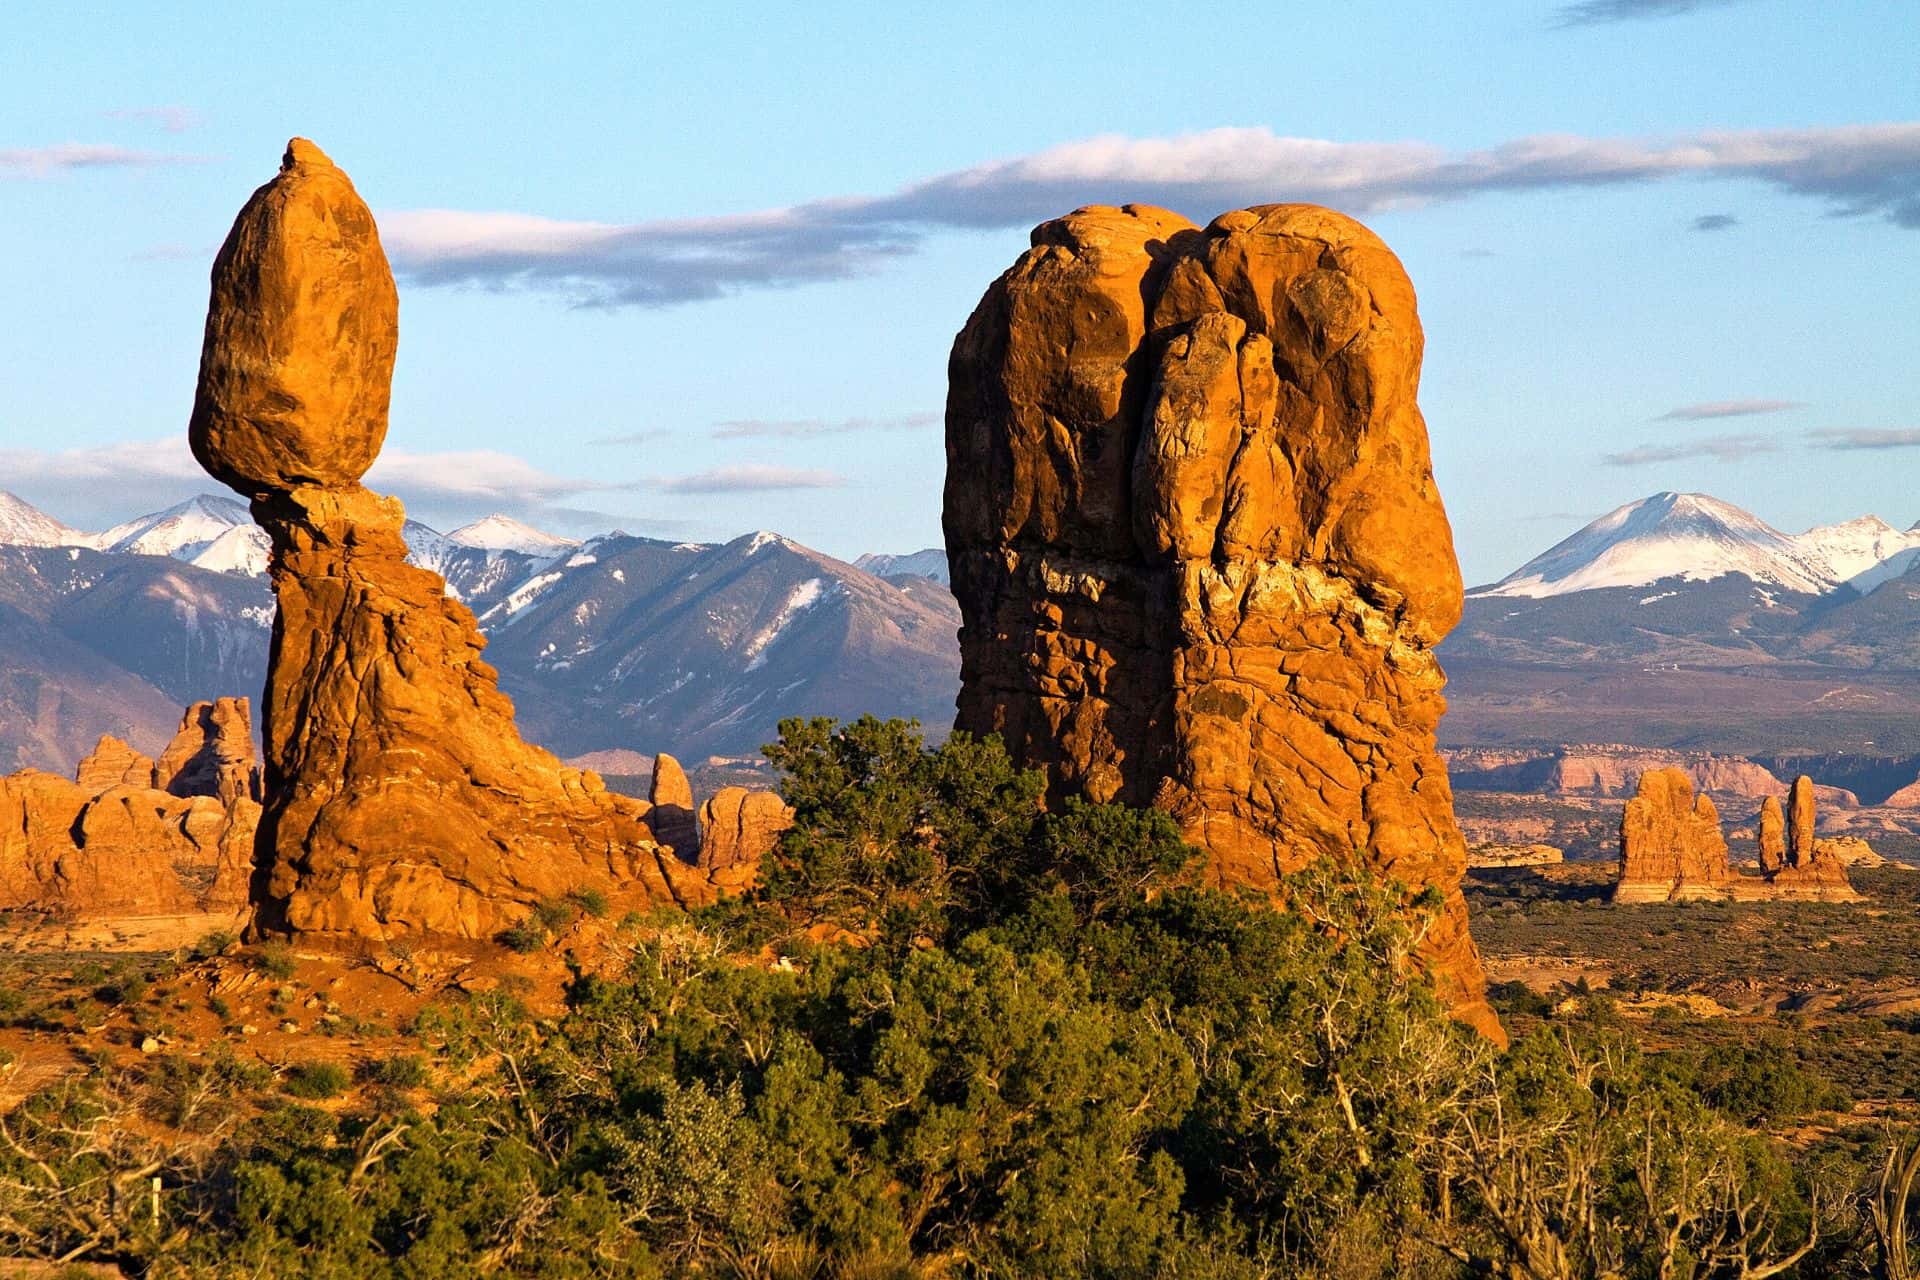
Balanced Rock is another famous rock formation in Arches National Park that is very popular to photograph.
The viewpoint and trail are located on Arches Scenic Drive right before the junction leading to the Windows Section.
First of all, it is difficult to capture a good image that shows how precariously balanced this rock is. So, give yourself some time to catch the right angle. Second, hike a short trail that circles the base of the rock. It will provide different views of Balanced Rock.
The best time to photograph Balanced Rock is at sunset when the setting sun brings out all the colors.
Balanced Rock Viewpoint / Best Photography Locations in Arches
Windows Section
The Windows Section in Arches National Park has several arches that you can photograph from different angles and distances.
To get to the Windows Section, follow Arches Scenic Drive and when you get to the junction right past Balanced Rock turn right. Next, follow the road to the end. Here, you will have several trailheads leading to Double Arch, South and North Windows, and Turret Arch.
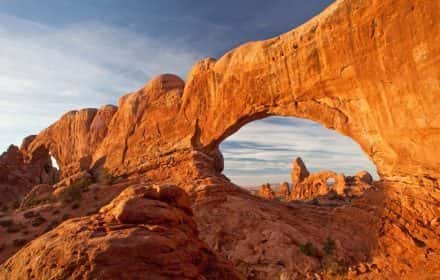
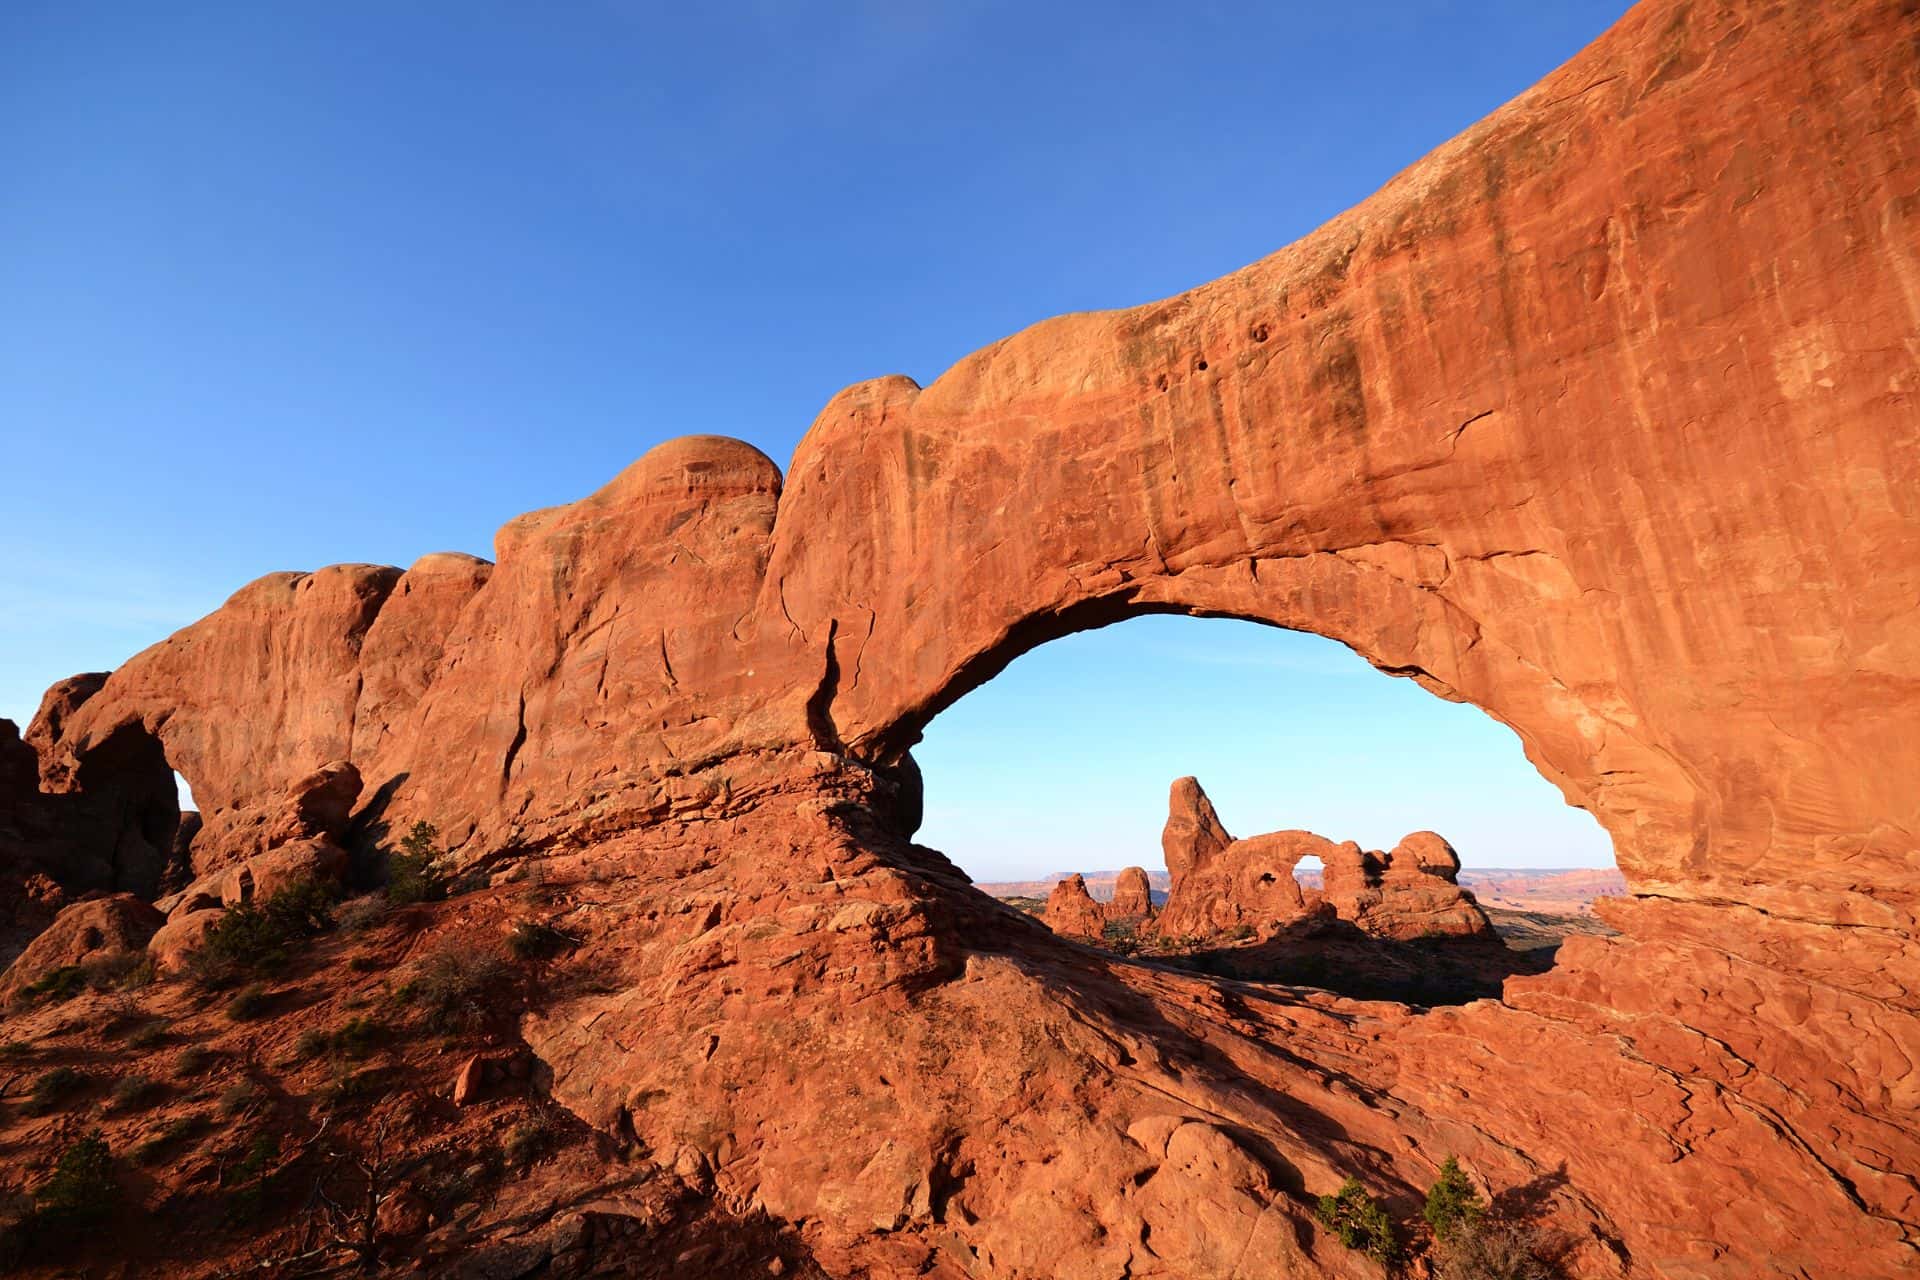
There is no doubt that the most famous composition of arches is the Turret Arch framed by the North Window. The best time to photograph Turret Arch framed by the North Window is early in the morning. First of all, take the trail leading to the North Window and scramble through the window to a small section located on the left-hand side. From this small perch, you will be able to photograph Turret Arch beautifully framed by the North Window.
Also, if you want to take some great photos of Turret Arch, then take the short trail that runs on the western side of Turret Arch. The best time to photograph Turret Arch from this location is late in the afternoon.
Windows Section / Best Photography Locations in Arches
Another great photo that you can capture is of both the North and South Windows inside the single fin. The best way to do it is to take the primitive trail that runs in the back of the two windows.
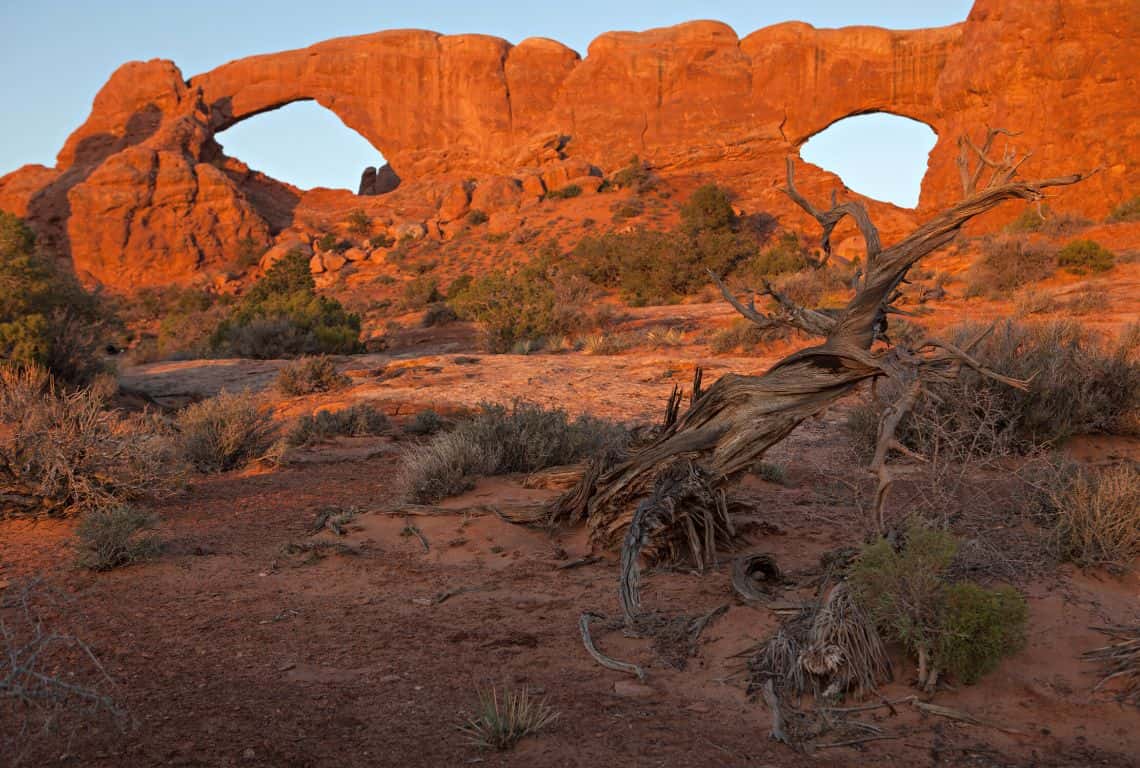
Windows Section / Best Photography Locations in Arches
Finally, make your way to Double Arch. It is one of the most dramatic arch formations in Arches National Park. The best time to photograph Double Arch is probably in the early to mid-morning.
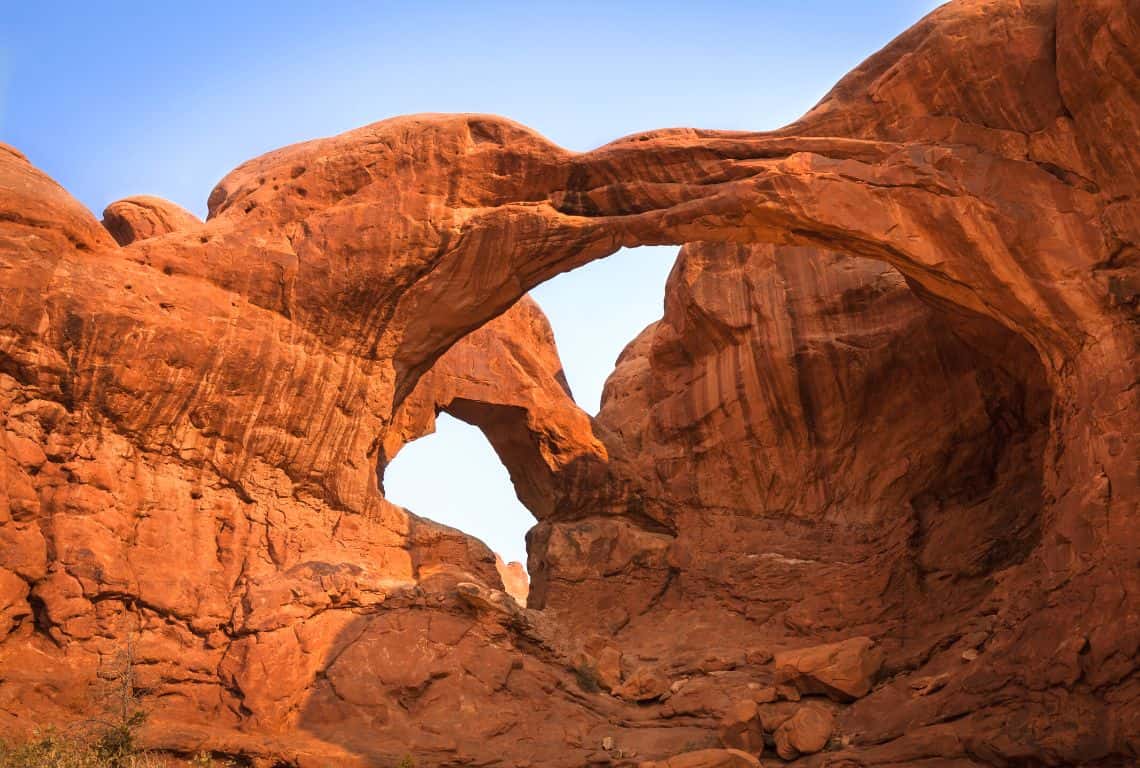
Windows Section / Best Photography Locations in Arches
Devils Garden Trail
At the end of Scenic Drive in Arches National Park are the Devils Garden parking lot and the trailhead that leads to Devils Garden Trail, the most spectacular hike in Arches National Park.
The entire Devils Garden Trail is 7.2 miles long. However, if you are not up to hiking the entire trail, it can be broken down into more manageable sections. If you can only do one section, then hands down, hike to Landscape Arch. It is one of the most spectacular arches in the park.
It is about 1.9 miles from the trailhead before you will reach Landscape Arch and it should take you about 50 minutes. It is a relatively flat section of Devils Garden Trail.
Landscape Arch is 290 feet long and it is believed to be the longest natural rock span in the world.
The best time to photograph Landscape Arch is in the morning. There are no shadows and the arch is pretty much in full sun. However, my favorite time to photograph Landscape Arch is at or right after sunrise when the sun rays illuminate the arch.
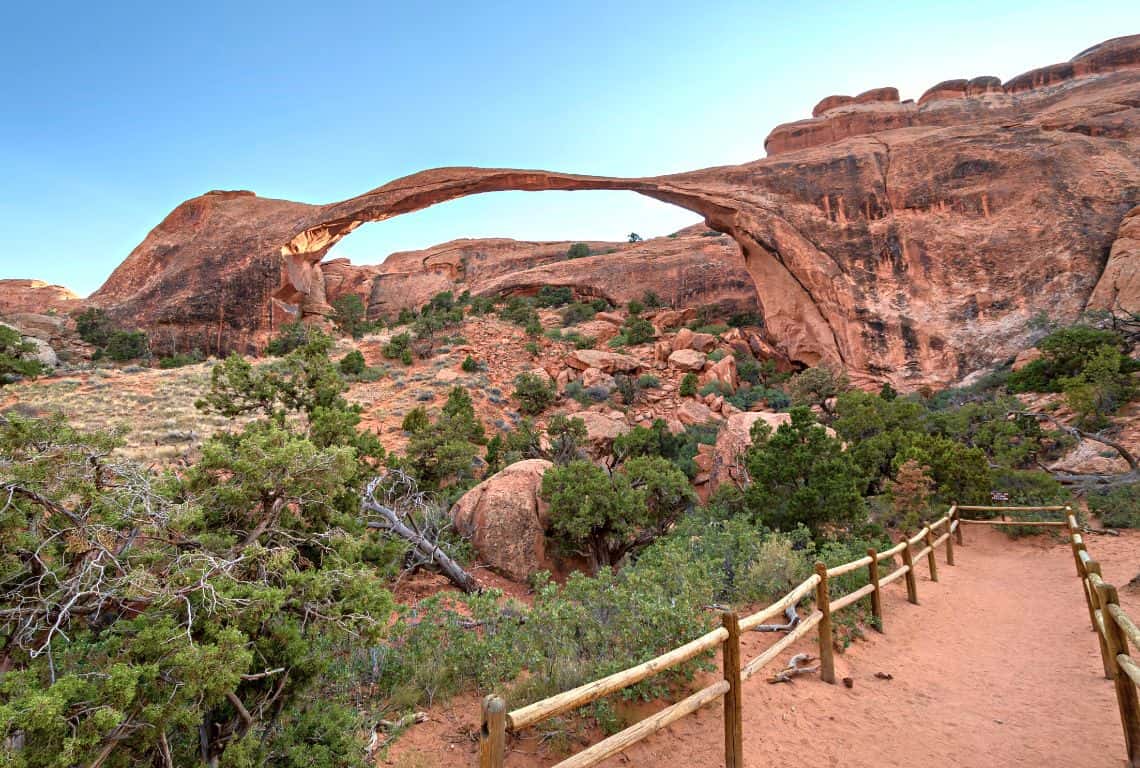
Landscape Arch / Best Photography Locations in Arches
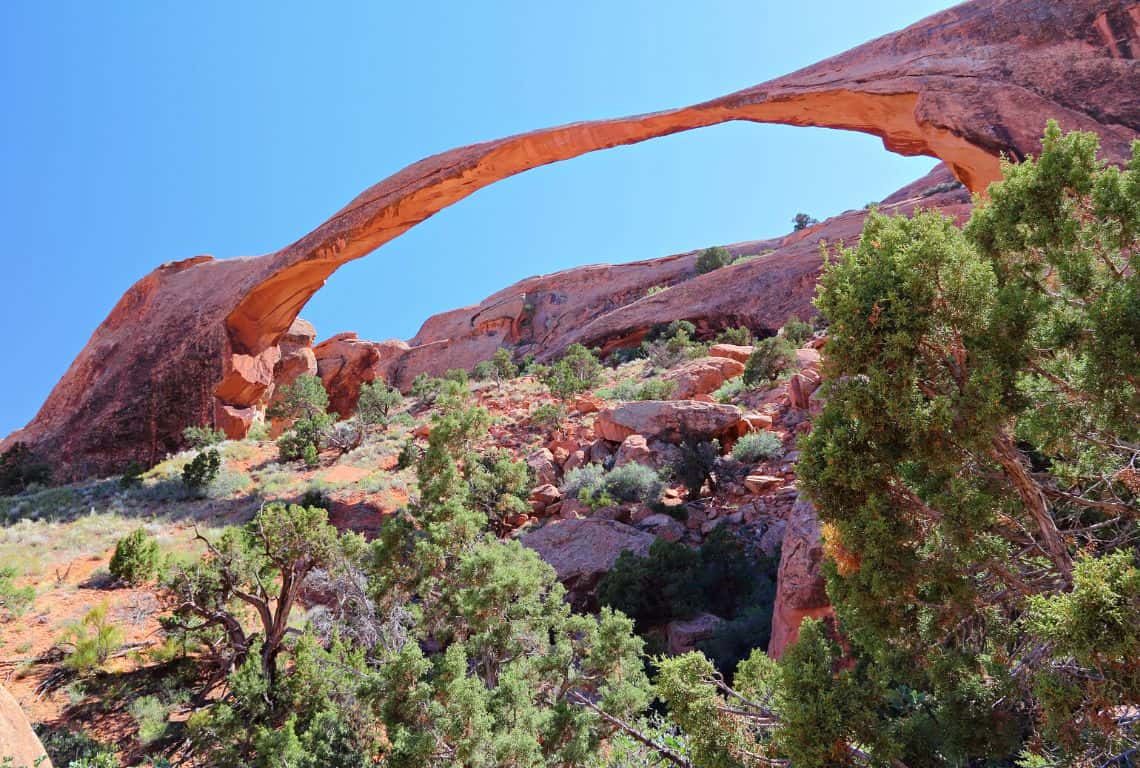
Landscape Arch / Best Photography Locations in Arches
Once you reach Landscape Arch, the Devils Garden Trail becomes a bit more difficult. You will have to do some rock scrambling, and pass by some narrow ledges.
In 4.1 miles, you will reach another stunning arch, Double O Arch. It’s a great location to photograph in the early morning as well as late afternoon since both sides of Double O arch are accessible.
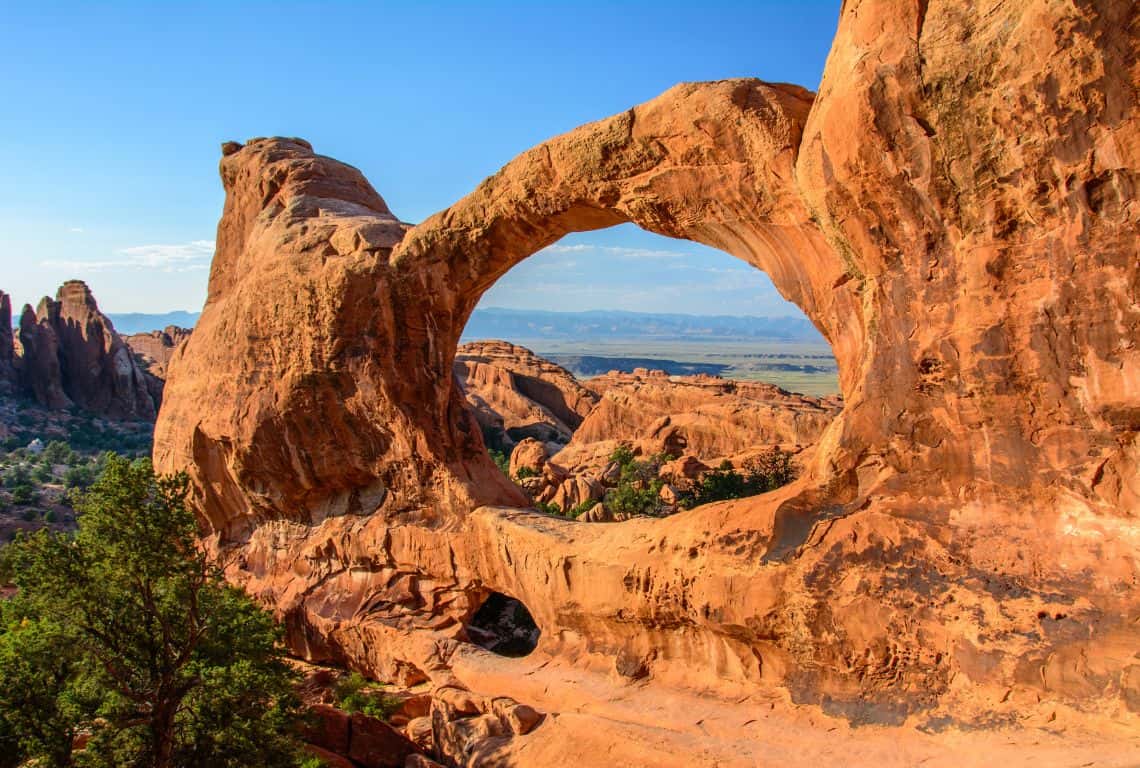
Double O Arch / Best Photography Locations in Arches
Sand Dune Arch Trail
Sand Dune Arch is located right before Devils Garden Trail and can be accessed from either Sand Dune Arch Trailhead or the Devils Garden Campground.
The arch is not easy to photograph because it sits in the shade for most of the day. However, it is a pretty stunning location to photograph since the arch is flanked by two large sandstone fins and surrounded by sand at its base.
Right next to Sand Dune Arch is Broken Arch. It is not as photogenic as Sand Dune Arch, but still worth checking out.
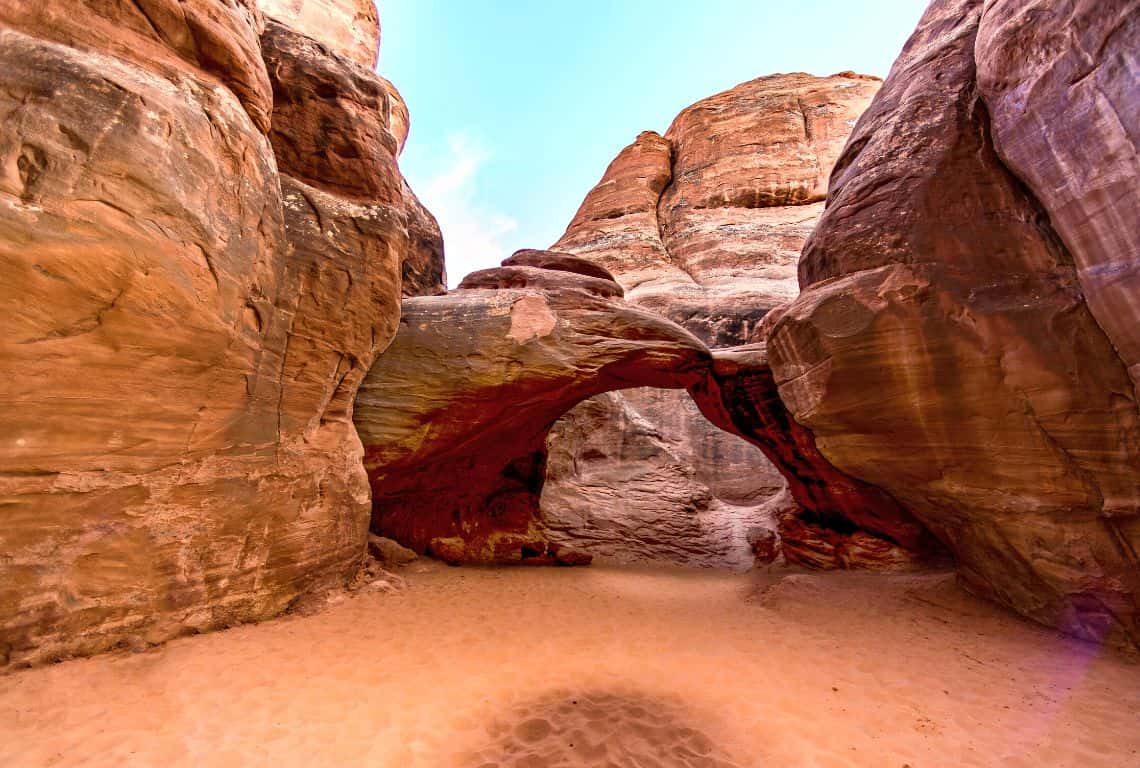
Sand Dune Arch / Best Photography Locations in Arches
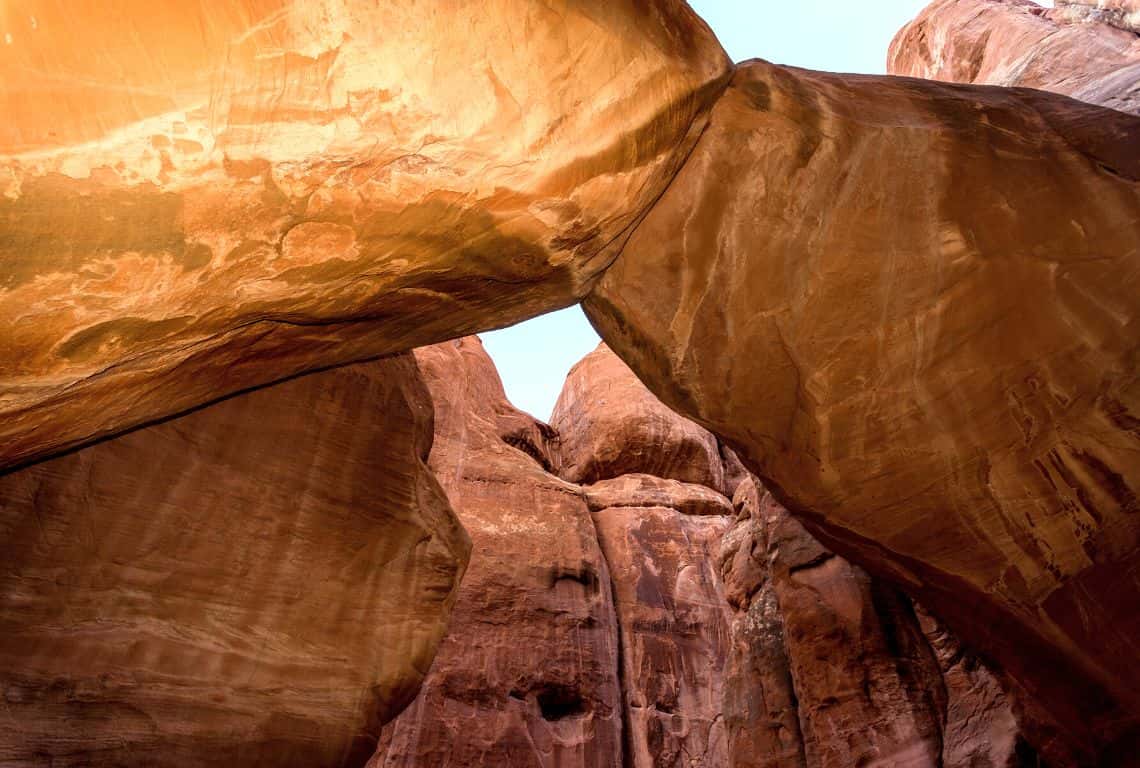
Landscape Arch / Best Photography Locations in Arches
How to Take the Best Photos at Sunrise or Sunset in Arches National Park
Sunrise is a great time to photograph in Arches National Park. However, sunsets can be as spectacular!
Actually, to be specific, the best light is about 15-30 minutes before sunrise or 10-15 minutes after sunset. It is the proverbial “golden hour” during which the daylight is softer and redder. Needless to say, it is the time during which the arches start to glow.
So how do get the best photos of the stunning rock formations at sunrise or sunset in Arches National Park? Here are some recommendations:
- Research and Scout Locations: Before your visit, research the park’s iconic arches and viewpoints that are especially photogenic during sunrise or sunset. Delicate Arch, Windows Section, and Balanced Rock are popular spots, but there are numerous other hidden gems worth exploring. Use online resources, maps, and photography forums to gather information and plan your itinerary.
- Arrive Early or Stay Late: To capture the soft, warm light of sunrise or sunset, be prepared to arrive early or stay late in the park. The changing light during these hours creates a magical atmosphere and adds depth and drama to your images.
- Use a Tripod: Stability is key for capturing sharp and well-exposed images during low-light conditions. Bring a sturdy tripod to keep your camera steady and avoid camera shake. This will allow you to use longer shutter speeds without blurring your photos.
- Experiment with Composition: Arches National Park offers a multitude of composition opportunities. Experiment with different angles, perspectives, and framing to create visually striking images. Incorporate natural elements such as rocks, vegetation, or foreground interest to add depth and context to your photographs.
- Bracket Your Exposures: During sunrise or sunset, the dynamic range between the bright sky and darker foreground can be challenging to capture in a single exposure. Consider bracketing your exposures by taking multiple shots at different exposures or using the auto-bracketing feature on your camera. This will allow you to capture a wider range of tones and ensure well-exposed details in both the highlights and shadows.
- Shoot in RAW Format: Shooting in RAW format gives you more flexibility in post-processing, especially when dealing with challenging lighting conditions. RAW files retain more information, allowing you to adjust exposure, white balance, and other settings without sacrificing image quality.
- Capture the Golden Hour: The hour just after sunrise and the hour just before sunset, often referred to as the “golden hour,” provides a soft, warm light that can enhance the colors and textures of the park’s sandstone formations. Be prepared to take advantage of this magical period for stunning photographs.
- Experiment with Silhouettes: During sunrise or sunset, you can create striking silhouettes by positioning subjects against the vibrant sky. Use the park’s unique rock formations or people as silhouettes to add drama and intrigue to your images.
- Stay Patient and Observant: Nature’s light is ever-changing, so take the time to observe how the light interacts with the landscape. Be patient and wait for those moments when the light is at its most captivating. Use this time to appreciate the beauty of the park and enjoy the photography process.
Remember, while capturing stunning photographs is important, also take the time to immerse yourself in the experience and appreciate the awe-inspiring beauty of Arches National Park.
Intrepid Scout's Tips on Best Photography Locations in Arches National Park
- Explore Different Perspectives: Do not limit yourself to capturing standard views. Experiment with various angles, compositions, and focal lengths to add visual interest and create unique photographs.
- Incorporate Foreground Elements: Including foreground elements in your compositions can add depth and context to your images. Look for interesting rocks, plants, or other natural elements to enhance your photographs.
- Utilize Leading Lines: The unique rock formations in Arches National Park often offer natural leading lines that can guide the viewer’s eye through the image. Use these lines to create a sense of depth and draw attention to your main subject.
- Consider the Rule of Thirds: The rule of thirds is a basic composition principle. Imagine dividing your frame into a grid of nine equal parts and place your subject or key elements along the intersecting lines or at the points where they intersect for a more visually appealing composition.
- Pay Attention to Details: While the park’s grand vistas are awe-inspiring, don’t forget to capture the smaller details that make Arches National Park unique. Look for interesting textures, patterns, and close-up shots that showcase the intricate beauty of the rock formations.
- Be Patient and Observant: Nature is constantly changing, so take the time to observe the light, shadows, and movement of the environment. Be patient and wait for those decisive moments when all the elements align for the perfect shot.
Visit More US National Parks:
13 Best Stops on SCENIC DRIVE in Zion National Park (Useful Maps+Practical Tips)
8 Best Stops on SCENIC DRIVE in CAPITOL REEF National Park (Map+ Practical Tips)
8 Things You Can’t Miss on FIRST VISIT to ARCHES National Park
10 Best VIEWPOINTS in GRAND CANYON National Park
Amazing ONE DAY in GRAND CANYON Itinerary (4 Cool Things You Can’t Miss)
Don't Have Time To Read it Now?
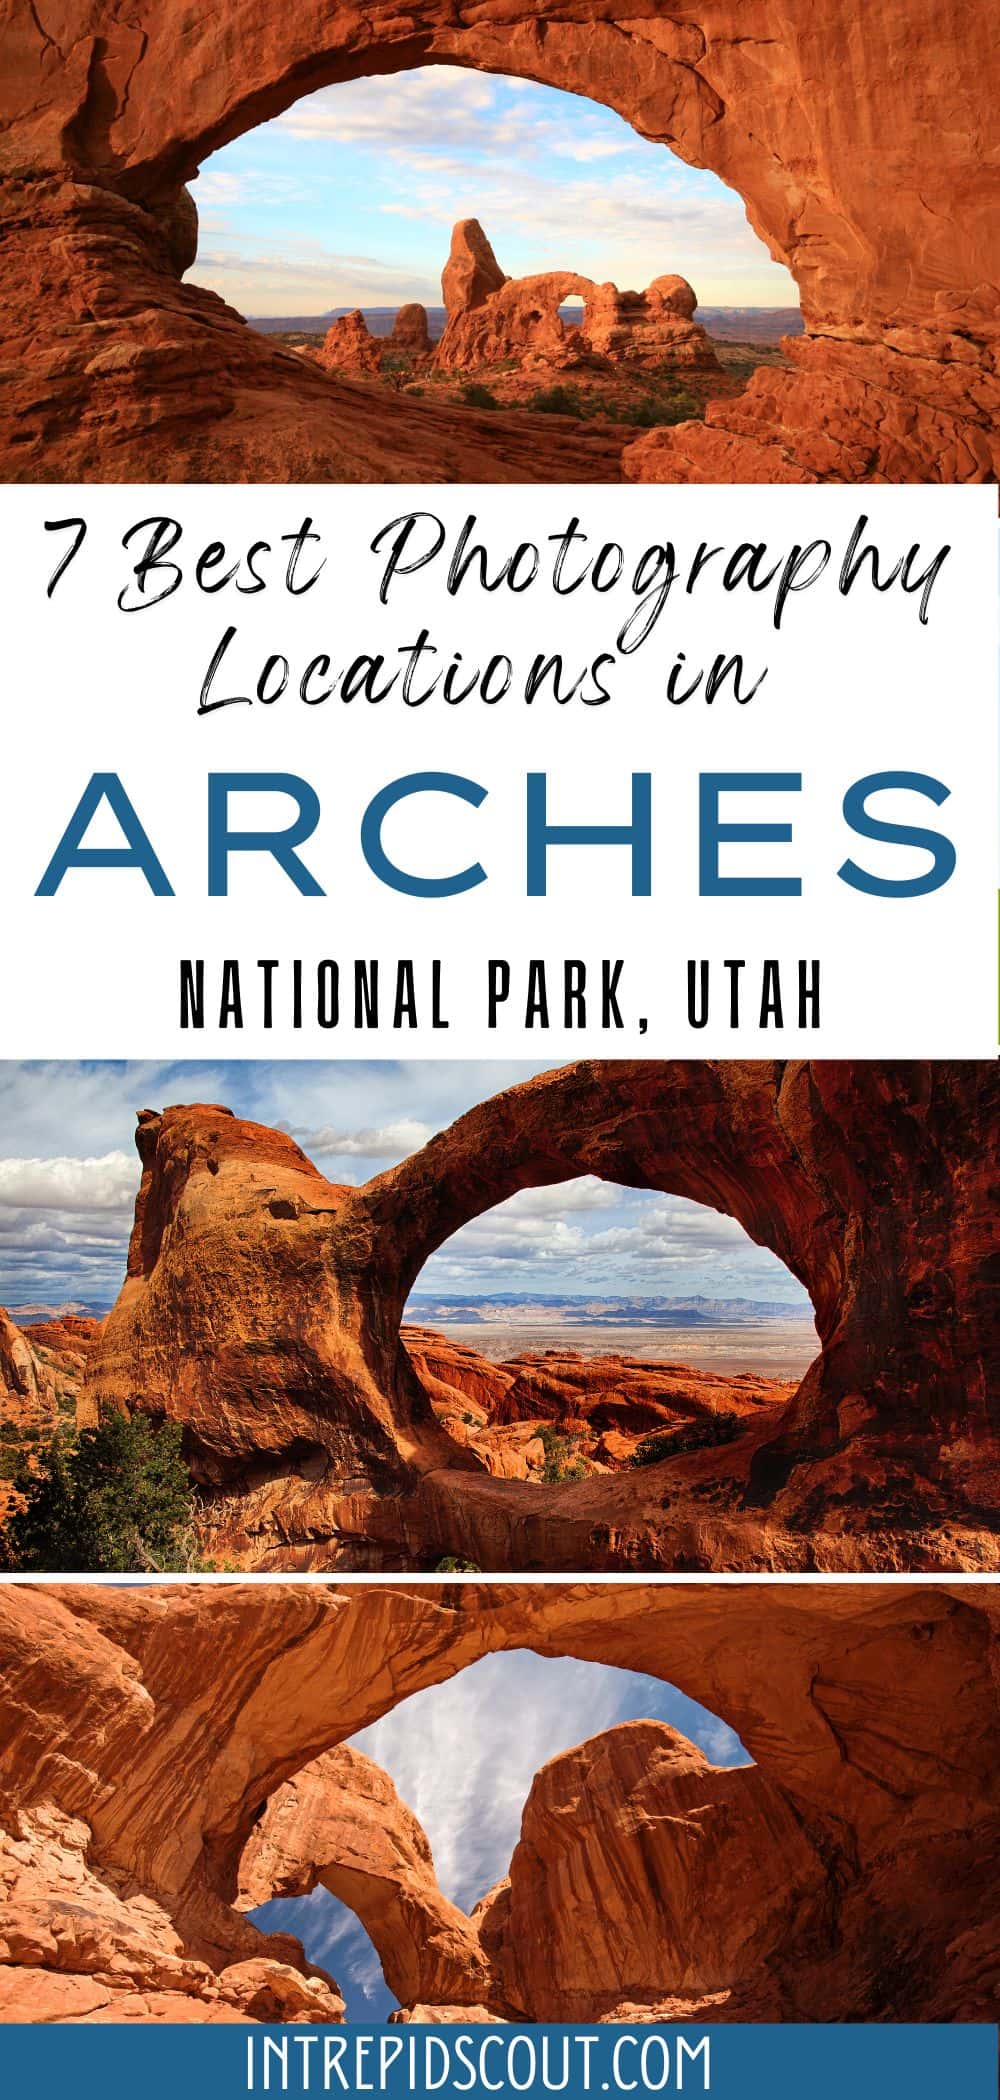
Why Not Save Best Photography Locations in Arches to Your Pinterest Board!
Now, It Is Your Turn, I Would Like to Hear Back from You!
Are you planning your trip to Arches National Park?
Please let me know! Drop me a quick comment right below!
Click on any of the images below to get inspired and to help you with the planning process for your trip to Arches National Park!
